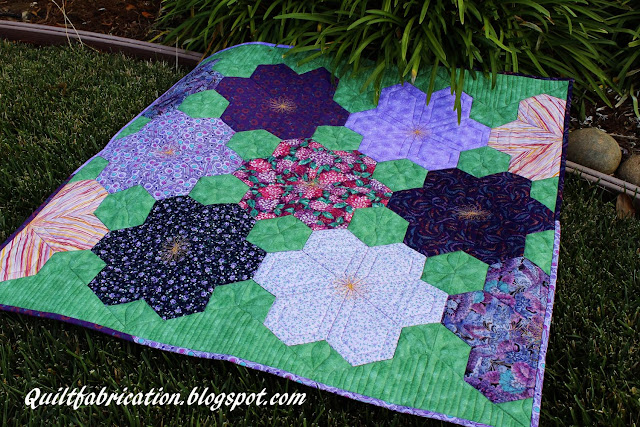
Still having a blast with applique, this time with flowers!
Originally jewel shapes, leftover from Jeweled Flower Garden, they could have easily made flowers.
But no, I decided to cut the tips off, making hexagons, and adding yellow centers, just like the two almost complete flowers. As for the green for the leaves, too bright. Fortunately, stored with the flower pieces were triangles of another green for the leaves. Though I had plenty of those, I wanted to be different and went with one leaf, not two. Therefore, Saw Tooth Flowers.
Stitching these to interfacing for applique was easy,
as I left 1/4" open at seams between the petals (hexagons), where the leaf joins. Keeping the fabric out of the way,
and clipping the interfacing,
made for nice inside points. The flower below just got fused, and the one to the left is still free.
I also got lucky that there were seven flowers, which made for a nice arrangement on the batik background.
The flowers are lined up in an orderly fashion, though I didn't get the measuring tape out for preciseness. Just eyeballed it.
Quilting is full of freehand leaves, in a medium green thread.
And the flowers all have purple veining and centers.
A fun, different project and so happy to use up flower parts and some yardage. As for the triangles I cut off the jewels - a project for next month!
Happy Quilting!
Yep, another interfacing applique project in the works.
This time it's hexie flowers, which were pieces leftover from last year's Jeweled Flower Garden quilt.
I found the pieces while looking for purple backing fabric for the Unlimited quilt, thrilled there was enough to make another top.
But this time, I thought I'd try the interfacing applique technique, with the pattern Blooming Hexagons from the Flip & Fuse Quilts book as my inspiration.
Ah, but of course, I have to be different! If you noticed in the first picture, I'm going with a saw tooth looking flower, with just one leaf on the edge.
Don't ask why. Maybe it would look more interesting than the standard hexie shape?
Still have to test it to make sure it turns okay. Once that's a go, I'll sew the other flowers together, and ready them for applique. Oh, and choose a background. So much yet to do! More to follow on Wednesday.
Have a great day quilting!
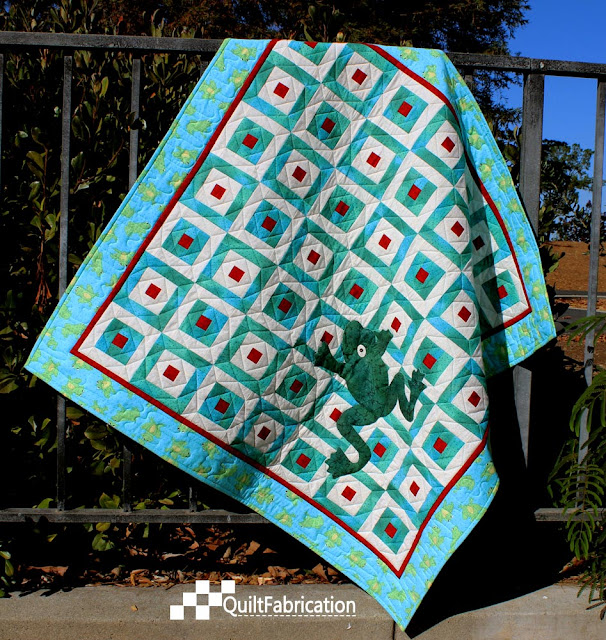
Two more finishes this week, the very cute Hoppy quilts! One in green for a boy,
and one in pink for a girl.
It looks like these frogs just jumped onto the quilts - they are so darned cute!
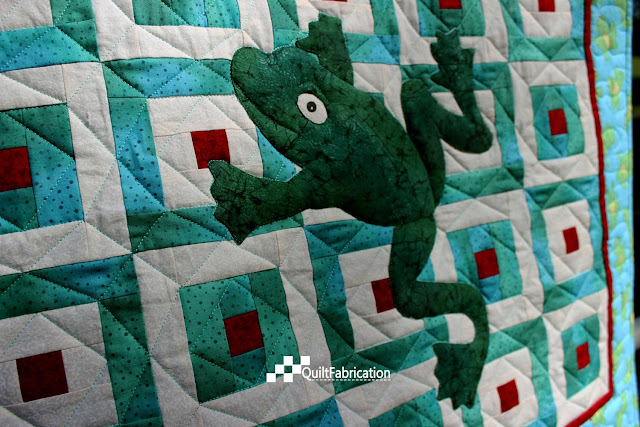
Using the fusible applique method, their little bodies aren't stuck to the quilt top, giving them a bit of dimension. If I had had the forethought, I would have put a little extra batting inside them to really puff them up, though they look great the way they are.
I liked the quilting that was used on Hoppy in the Flip & Fuse Quilts book (affiliate link),
and figured out how to quilt a continuous line with minimal backtracking.
Just love the look it gives to these blocks!
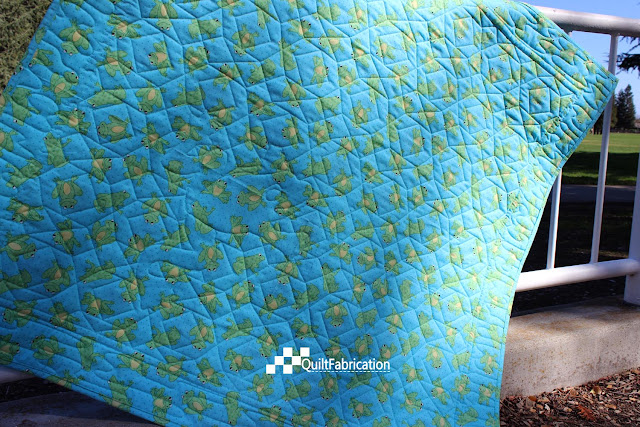
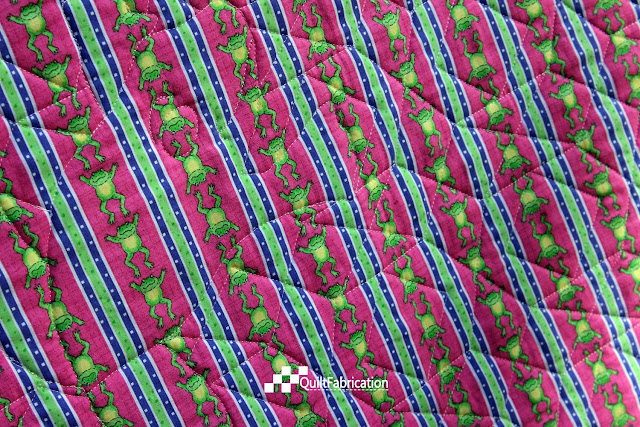
And can't forget the backs. Many thanks to my neighbor who was selling off her stash - I've put the frogs to good use.
I have really been enjoying the interfacing applique technique, can't you tell?
Have a great day quilting!
It feels really good when quilt ideas finally come to reality - Seed Mix and Unlimited can be checked off my list. And I'm still fascinated with applique. Yep, you guessed it, a couple more quilts are in the works.
At first, because I had the other two quilts to experiment with regarding interfacing applique, I thought I wouldn't make any of the quilts in the Flip & Fuse Quilts book (affiliate link). After taking another look, I decided on the challenge of appliqueing frogs. Crazy huh?
Modifying the Hoppy pattern to a smaller size, fabrics were pulled for both a boy version and a girl version. With a smaller sized quilt, I could also use just one frog per top, instead of three, cutting down on the time spent turning frog legs.
After a Sunday sewing (it was raining - hallelujah!), this is the stage the Hoppy quilts are at. Isn't that frog adorable?? Though his legs look narrow, he wasn't that hard to turn. Just a bit time consuming, but a great project to work on while watching TV.
Still a long way to go, though they should be finished this week. Hmm, what else can I applique?
Another finish this week, an improv one, which I'm calling Unlimited.
The idea for this quilt had been on my mind for almost a year, and once again, just like Seed Mix, the Flip & Fuse Quilts (affiliate link) book brought it to fruition.
First, the background creation. Ten months ago, the circles were hauled to the store and placed onto many different solid fabrics, until the combo of different blues and purples sang in harmony with the circles. Fabric bought. Fabric sat.
Enter Flip & Fuse Quilts this September and it was time. With a little help from Ricky Tims Convergence Quilts (affiliate link) I decided to make long panels to design with. (Out of view in the upper left is the purple stretching a full WOF).
Starting with 6 1/2" strips, and working down to 3 1/2", I went to work on the design wall, shifting, replacing, flipping, etc, to find a pleasing arrangement. I was also keeping to a certain length, around 40 - 45".
Once the strip placement was set, I added more of the bright green in between some strips.
Having marked strip length with pins, everything was sewn, and then the ends were trimmed, making it all even.
And the background is ready to go. I could have stopped there, as this would also make a great quilt just by itself.
As for the circles, many years ago, I played with the shaving cream dyeing technique, making lots of interesting fabric pieces. But what to do with that fabric? Then an opportunity to learn how to make circles using the yo-yo method and pressing around a CD created the perfect chance to use said fabric.
Fun, but, upon re-examining those circles (they've been sitting for a year), I didn't like the small points on the edge that the gathering was creating.
So I decided to remake them, using the interfacing technique used in Flip & Fuse Quilts. Aren't they smooth?
Here's the backside, with the interfacing.
Definitely an improvement, though there's nothing wrong with the first technique. I just wanted really round circles!
And I wanted to use up those circles! That's why there are a lot of them on this quilt. Placed randomly, but with some sense of order, they add an interesting feature to this quilt.
As does the quilting. Lots of straight line quilting here, with some overlap to create crosshatching.
Originally, I thought I'd quilt within the circles, but once again, just like in Seed Mix, the circles look better not quilted, allowing the shaving cream dyeing technique to show off.
Inspired to make your own improv piece yet? Hope so!
Have a great weekend quilting!
Updated January 2021
Ready for another binding method? This time it's No Show binding,
for those quilts that would look better if the design went off the edge and no binding to stop the view. Modern quilts, art quilts, landscape quilts, etc are candidates for this method. First used on Seed Mix,
which provided all of the demo shots for this technique, the no-show binding makes it appear that the quilting lines don't stop just because the quilt does.
There are many instructions out there for this binding method, and I chose to combine bits and pieces to do what works for me, and for this quilt. Feel free to follow along, or change it up to suit you.
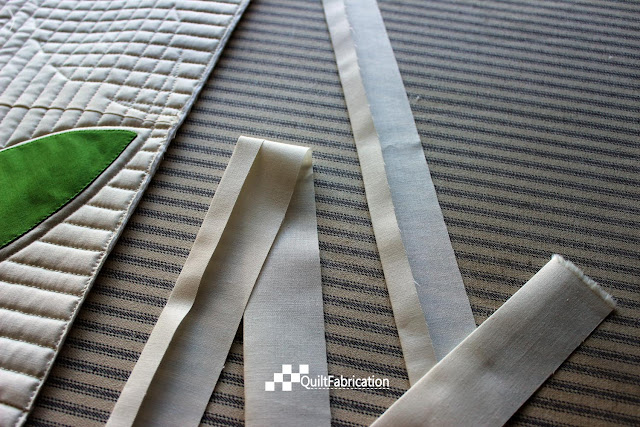
For this binding, I cut 2" wide strips, WOF, and pressed over a 1/2" on one side. Wider strips, or even a strip pressed in the middle can be used, it's up to you.
Cut strips to the length of the sides of the quilt, minus 1". Place the strips on the front of the quilt, with the fold up, leaving 1/2" space on each end (eliminates bulk). Stitch with a 1/4" seam allowance from the edge.
Press the binding away from the front, and stitch again within the seam allowance, close to the edge of the quilt.
Press the binding to the back making sure that the seam is turned towards the back at the edge. Hand stitch the binding to the backing along the fold.
Once stitched, complete the other two bindings in the same manner with one change. Cut 2" wide strips, 3" longer than needed for those edges. Press a 1/2" fold on one side.
The corners need the batting trimmed out between the binding stitching, approximately 1/4" to 3/8" square. This eliminates bulk and allows the corners to fold over. Trim out now or after stitching the next binding edge (see instructions below).
Pin the binding onto the front of the quilt for stitching as before, but turn 1 1/2" at the ends around the edge to the back of the quilt. Stitch a 1/4" seam through all layers.
Flip the corners right side out, trimming a square of excess fabric/batting out of the corner if not done previously. Press the binding away from the quilt front, and away from the back at the corners.
Stitch again in the seam allowance, close to the quilt edge, through all layers plus the folded over corner binding.
Press the binding to the back, with the seam showing towards the back, tucking the corner pieces into place under the binding. Pin in place, and hand stitch the corner closed on the quilt edge, then continue along the fold of the binding.
Once finished, the quilt has a beautiful edge, both front and back, with no interruptions to the design on the front.
Give it a try on your next special quilt!

My Favorite Patterns


