Remember Blossoms,
my wall hanging using the Crafted Applique (affiliate link) technique?
In that post, I mentioned that I would do future testing on how this technique holds up in the wash. And now the time has come:
and I would say PRETTY DARN GOOD! Granted this was just one 25 minute wash with a full tumble dry, but I'm pretty impressed! So for all of the inquiring minds out there, yes, the Crafted Applique (affiliate link) technique is well worth the effort, as no, that fabric does not fray.
For me, this is really exciting! I have a snowflake project, with a deadline, and thought I would use the Crafted Applique (affiliate link) technique AND my Silhouette Cameo (affiliate link) cutting machine. Hoping that by combining the two, the project will be done in no time! I'll let you know how that works out, though I can't share the project until sometime in the fall - sorry to make you wait.
See you tomorrow at Midweek Makers, as now I'm off to prep my fabric for snowflakes!
A few pieces of leftover strip sets have turned into an awesome new quilt pattern - Stock Market!
A fabulous scrap busting quilt with a modern take on the classic strip quilt.
Using my technique of pantographs plus custom quilting,
the pretty pantograph, Hot Cocoa, was quilted all over the background, while the orange jagged line has straight line quilting.
And because I like to continue the designs to the edge, matching angled binding completes the quilt.
Leftover scrap pieces from the front made a long strip set for the back, helping to make it wider. Doesn't that look great?
Here's a closeup to see more of that yummy quilting!
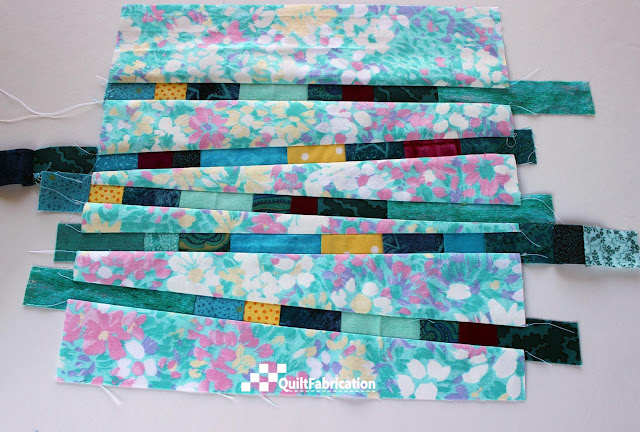
A fun fact about the front side of that backing fabric. It actually looks like this:
Rather dated, wouldn't you say? Ah, but the backside was muted, with a grey - green cast and little bits of coral from the flowers.
Now a perfect fit with the front of the quilt! By the way, any leftovers of it have gone in the recycle pile - not playing with that fabric again!
Interested in busting your stash of strips? Give Stock Market a try! The pattern comes in two sizes, lap (54" x 77") or twin (70" x 77") with full, detailed instructions for both, including how to easily match angles. The pattern is geared toward the confident beginner/intermediate quilter, comfortable with 45 degree angles. Color choices are unlimited too - wouldn't this look great with black scraps, a grey background, and a red line? Be creative - make it your own!
Happy Quilting!

Yep, with few moments here and there this weekend, I made fabric. From scraps that is. Then cut it up again.
Now I should have been finishing up the strip quilt, but this weekend, I just wanted to sew. The doesn't-take-much-thought kind of sewing. Plus, the scraps were calling.
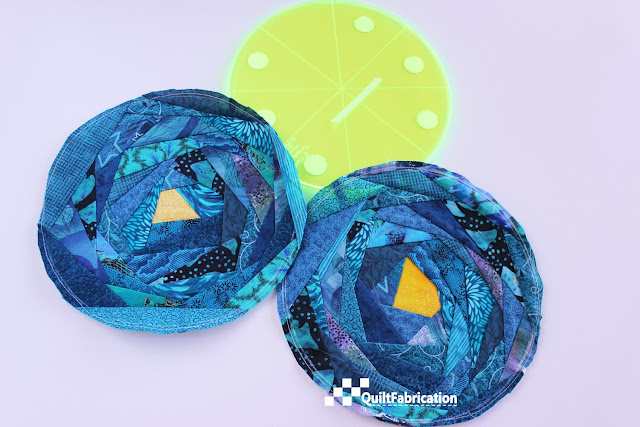
Helping my mission, I realized I didn't have an aqua RSC17 circle, or pieces for small pinwheels, both to be set aside for future quilts. Not seen in the picture above were these sort of circle-y things I made a few years ago, from long, narrow right triangle pieces. I think I wanted them to be flowers.
That idea didn't go anywhere, and they got thrown in with the rest of the scraps. Well, with a few more pieces, they are now full on circles.
Done! Check circles off the list, with a found purpose for these cast offs!
The rest of the scraps got sorted into light, medium, and dark. Then each value was stitched to a 4" x 8" rectangle drawn on phone book paper.
Then trimmed up, and cut into 2 4" squares, to later be made into pinwheels.
Notice more of those long, narrow right triangle pieces. Boy, I sure had a lot of them! But now there are usable squares: 8 pairs of lights, 5 pairs medium, and 6 pairs dark. That may be enough to make a baby quilt! Now that scrap pile is down to this:
My mission of using up the odd shaped scraps has almost been accomplished! So if you are wondering what to do with your scraps, try making your own fabric for use in a future project. Have fun with it!
Happy Quilting!
This month's block of the Growing Up QAL is an improv block, right up my alley!
Using scraps from the red, cream, and navy of the other blocks, I started out making four patches.
The finished block needs to measure 12.5" x 12.5", and the easiest way to achieve that is to lay pieces on a 12.5" x 12.5" square cutting ruler. Then start playing!
After sewing the pieces on the left together, I decided I wanted a more modern, offset look on the other side.
Fortunately, there were wide enough pieces to fill in at the bottom and bring the block to 12.5".
Just need a bit more on the right side.
Hmm, not liking all the cream at the top. Maybe I'll add some red in the corner.
Much better! Now to trim to 12.5" x 12.5",
for a modern improv block! Many thanks Alida, at Alidatweloqdesigns, for a fun exercise this month!
Tomorrow, it's Midweek Makers and I'll share more progress on the aqua scrap quilt - see you then!
Seven hanging sleeves. Yep, seven. That's what I get for entering so many quilts into the fair.
The fun part -making up the sleeves! Referring back to my Hanging Sleeve Tutorial from a couple years ago, I put the pedal to the floor and had all seven sewn up, ready to go in under an hour. What a jackrabbit I am - woohoo!
Enter the turtle, the slow part - hand stitching to the quilt backs. We've heard it before - slow and steady wins the race. The only thing I'm racing against is the clock! This is definitely a sit-in-front-of-the-TV kind of project, so as not to take precious time away from major sewing.
But as everyone knows, quilts need sleeves in order to hang in a show, though I have extra reasons to get this done now:
a) these quilts need get off the spare bedroom floor,
b) I need the floor space in said room to continue with the aqua scrap quilt, and
c) hubby would like to keep the door open to said room, which is shut to keep cat hair off of the quilts,
d) and though they haven't said anything, I'm sure the kitties would like to lay in the afternoon sunshine in that room.
Good reasons to get this accomplished this weekend, don't you think? Hope your weekend is better!
Pixie Sticks is now a quilt!
That was fast, wasn't it? Once I got the technique down on the first four blocks, the next five sewed up in a snap.
The original Pixie Sticks pattern is for a table runner, with the blocks turned. But wanting to use up the fabric, I opted for a nine-patch layout, with the blocks also turned. Looks awesome!
With the refreshing, fun vibe this quilt was giving off, and since it's going to be a baby quilt, how about some daisies?
Oh too sweet! And love that border fabric - it's 'Painter's Canvas' for Michael Miller. Reminds me a lot of grunge, another awesome fabric line!
To add to that, a soft, striped pink flannel finishes off the back.
Love, love, love, love, love!
I definitely have to keep the Pixie Sticks blocks in my stash of ideas - makes for a great scrap buster. If you're adventurous, give this a try, or get your hands on a copy of Stash Lab (affiliate link) for the full instructions.
Have a great weekend quilting!
Here's four Pixie Sticks blocks to show off!
Starting out with scrap strip sets and a pretty background, these are coming together nicely. And hooray for using up scraps and yardage!
For variety, I made up 5 different strip sets, and switched up the placement in each of them.
And for speed of construction and consistency, all blocks were stacked and cut at the same time. Working one strip at a time, the blocks went together easily as they are over-sized to allow for imperfect edge matching. Once everything was sewn together, the blocks were trimmed to the correct size.
I wish I could give you more details about sizes and such, but that wouldn't be fair to the author of the Stash Lab (affiliate link) book. But I think you can get the drift on how this is put together.
The Pixie Sticks pattern calls for the addition of a side strip to each block, to make a table runner. I won't have enough fabric for that and more blocks, so choosing the more blocks option. I'm thinking baby quilt - go figure. Goodness knows I have enough aqua scraps for that!
This is a really fun way to use up those scraps - give it a try!
Happy Quilting!
Just a bit late to get the new Book of the Month feature to appear in your May 1 inbox, but at least the choice is up in time! This month's selection goes to Tonya Alexander and her book, Stash Lab - Simple Solutions for Scrap Quilts (affiliate link)
Back in March when I was in the library seeking landscape quilting books for Santorini, I couldn't resist several books dealing with scraps. Since I'm on a mission this year to use up my bags of scraps through RSC17, I couldn't turn down a little inspiration from others. Though some of the books had great quilts, the scraps sizes/shapes they used are not what's in my bags. Back to the library they went :(
Within the Stash Lab (affiliate link) book, there are a couple quilts suitable for my scraps, and I may even cut into some yardage. Definitely a win-win if I can use scraps and yardage up - makes some room for new fabric!
So come join me on this month's scrap journey, and let's clear out those scrap bins!


