 |
| Improv Freehand Cut Fused Stripes |
Though I like the first one, with it's crazy waves,
 |
| Improv Freehand Cut Stripes |
it's not quite what I'm wanting for my project. But both of them are definitely inspiring aren't they? Let's have a look at how these two were made, shall we?
Improv Freehand Cut and Sewn Stripes
The first set, the wavy ones, were all freehand cut, by overlaying the fabrics to get a matching cut curve. The overlay shown below starts the process.The small black and white scrap pieces are discarded, then both fabrics are separately freehand cut again to make two strips. Makes it easier to sew!
Remember the first overlapping cut, the one in the center of the picture above? That's the seam that gets sewn together, because the curves match up, making the process so much easier.
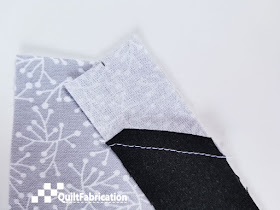
For the next stripe, the trick is to lay the cut curve on top of the next fabric, and cut a curve to match. Below, I've laid the white stripe onto the end of the black, leaving enough black exposed for the next stripe. Then cut, following the curve of the white.
And so on, and so on, until the needed size piece is sewn.
Those were certainly fun to make, but I wanted the stripes narrower, like a 1/2", and not as wavy. Onto my next construction idea - fusing!
Improv Freehand Cut and Fused Stripes
For this, I started with a decent width of white fabric, and a bit less of black, then added fusible web to the entire WOF piece of black.And then happily cut away, stripping that black into lots of 1/2" WOF pieces!
But the fun doesn't end there! Next came placing and fusing the strips,
and stitching them down with a trusty zigzag (2.0 width, 2.5 length).
Don't you just love the rolls - keeps everything all neat and tidy! And stitching on each side of the piece also meant no scrunching in the machine throat, though it did mean stitching on the left side of the stripe. But I'm a big girl - I can do it!
Super happy with how this came out - it's what I envisioned!
But don't worry, I'm not throwing out the other piece - I just need to find a suitable project for it.
Now that you've seen how it's done, are you ready to make some stripes???
Happy Quilting!


