Monday, August 27, 2018

Mitered Quilt Border Tutorial

New tutorial today - it's all about mitered borders!


Mitered Quilt Borders Tutorial at QuiltFabrication


My last quilt, Leaf Piles, used a striped inner border that required mitering in order to look it's best. If I had done the usual strip method (side borders on first, top & bottom borders last), the border corners would not have looked very good with the stripes butting into each other. With mitering, the stripes now border the quilt in a ring, one color, and then the next. 

mitered inner border on Leaf Piles

Mitered borders may look pretty scary, but really, they're pretty easy. Let's walk through the steps.


1. Border Length.


All borders strips are cut to the quilt top side lengths, plus an additional 2x the border width plus 1". The 2x the border width makes sure to cover each adjoining border, and the extra 1" is added insurance.


overlapping quilt borders

Here's some math: my finished border width is 4". To each strip, I'll add 2 x 4" + 1" = 9", giving the strip extra overlap on the adjoining borders. The above picture has more because that's the original length of the border strip I was working with. Personally, I'd rather have more fabric to work with than less! 


2. Sewing the Borders.


Stitch all the borders on, starting and stopping 1/4" from each edge at the quilt top corners.


stitching to within a quarter inch from each corner edge

Make a mark 1/4" in on each edge for easy reference, and backstitch to lock in those seams. Otherwise, those stitches have a pesky habit of coming out. Don't pile up the stitches in the corner, or leave a big space - it should be close but not too tight.


corner stitching with a small amount of space


3. Marking a 45 Degree Angle.


Holding the corner in on hand, fold the quilt top on a 45 degree angle from that corner. Line up the border seams and border edge, pinning everything in place.


quilt top folded on a 45 degree angle

Using a straight ruler with a 45 degree mark on it, line up that mark on the border edge with the ruler edge on the 45 degree fold of the quilt top.


lining up ruler for the 45 degree angle

On the borders, mark a line along the ruler edge, from the seams in the corner to the edge of the borders.


marked 45 degree angle line


4. Stitching the miter.


Starting at the seam end of the corner, stitch along the line to the border edge.


stitch on the 45 degree mark


5. Check the miter.


Unpin and open up the quilt top to check the miter. The corner where the three seams meet should lie flat, with no tucks and no gaps. The borders should also be square.


check miter seam and corner on front side of quilt

If there are issues, un-stitch, and repeat the process. I've found that overlapping stitching in the corner causes puckers. Leaving just a half stitch gap appears to allow the corner seams to have space to relax.


corner seam of a mitered border

And out of square borders can be caused by stitching at an angle that is not 45 degrees. 


6. Trimming.


When the corner is perfect (or at a point that you're happy with it!), refold the top to reveal that 45 degree stitching and trim the seam (the extra border length) to 1/4". Press open to decrease the bulk of fabric at the seam corner.


press mitered seam open


7. Stand back and admire a beautiful mitered corner!


mitered quilt border

Ready to give it a try, now that you know how easy it is? Hope so!

Happy Quilting!


Follow on Bloglovin

My Favorite Patterns

Friday, August 24, 2018

Leaf Piles Quilt

Sharing the week's quilting distraction, Leaf Piles,


Leaf Piles Quilt

made from the woodpile blocks from a few weeks ago. And I must say, this was a worthwhile diversion!

Having grown up in New England, I absolutely love autumn colors. Aren't these just beautiful?


Leaf Piles autumn colors

Though I don't really think you'd find a purple leaf while out leaf peeping, the color does look lovely with all the oranges, golds, reds, and browns.

I'm also fortunate to have had just enough of the awesome leaf border fabric to tie it all together.


Leaf Piles border

And there's also that striped inner border, for which I'll have a mitered border tutorial on Monday.

As for the name Leaf Piles, the rounds of color in the quilt remind me of the many leaf piles we create in our backyard from our Pin Oak leaves each fall. 


Leaf Piles Quilt full view

I'm also thrilled to have used some other fall fabric for the backing, clearing out a few more yards in the stash.


Leaf Piles Quilt backside

With the addition of a really beautiful leaf pantograph in gold Glide thread, the quilting just really makes this quilt sing!


Leaf Piles Quilt leaf quilting

Just the other day, I put away all of the patriotic quilts, and brought out the fall items. That includes this Leaf Piles lap quilt, it's big sister, Falling Leaves,


Falling Leaves Quilt

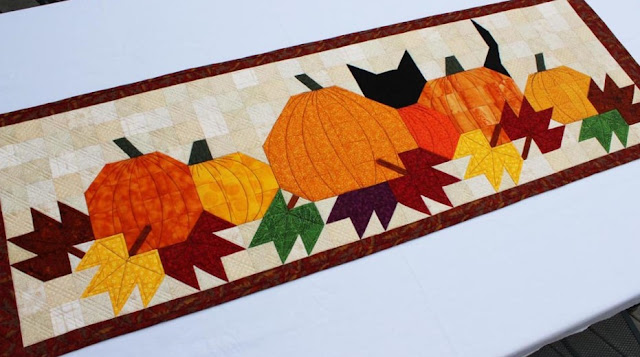
the Pumpkat Patch runner (pattern available),


Pumpkat Patch table runner

the Sunflower runner (pattern available),


Sunflower runner

and my favorite, Seed Mix - super happy to see it again!


Seed Mix by QuiltFabrication

I'll be looking at these fall quilts for the next several months, probably through to Thanksgiving. But that's ok - I love them all! 
Time for you to be pulling out yours to enjoy!

Happy Quilting!


Follow on Bloglovin

Friday, August 17, 2018

Yuletide Fir Pattern Release

Merry Christmas again! And I have a present for you - keep reading!


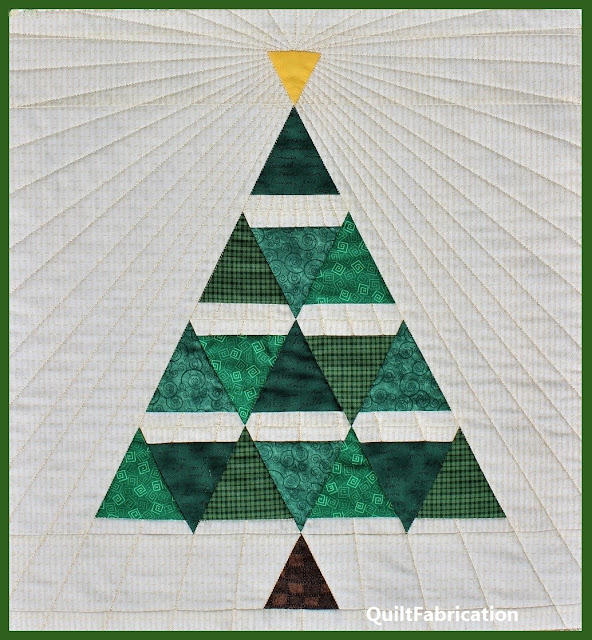
Yuletide Fir Christmas Tree wall hanging by QuiltFabrication

The Yuletide Fir Christmas Tree, made for the 12 Days of Christmas Blog Hop last month, is now available as a pattern! Made from alternating triangles, the pattern includes detailed instructions, and is suitable for the confident beginner quilter familiar with quilting.


Yuletide Fir Pattern by QuiltFabrication

I received such positive comments on the uniqueness of this 19" x 21" tree wall hanging, 


Yuletide Fir closeup

with over half of you expressing interest in a written pattern, that your request is now reality. Find the Yuletide Fir Christmas Tree pattern at Etsy.


Merry Christmas, and may your star shine bright!


Yuletide Fir star and quilting


Follow on Bloglovin

Friday, August 10, 2018

Saxon Quilt and Block tutorial

Yeah! A fabulous scrap finish!

Saxon quilt by QuiltFabrication

Check out Saxon, a total improv quilt made from scrap circles as part of RSC17.


scrap circle from January RSC17

scrap circle from February RSC17

And these four were all I made, as I gave up on RSC17 after 3 months, and they have been tucked away ever since.

But then the book Stash Statement came along, featuring beautiful quilts made from scraps, and I was inspired again after making the Regatta quilt.


Regatta quilt

Deciding to inset these 8 1/2" unfinished circles into 13" squares (see the Inset Circle tutorial to see how that's done), 


how to inset circles into a quilt block

I really wasn't sure where to go from there. I wasn't about to just sew the blocks together, cause that would be bor-ing.

So, using the block centering marks I had made when insetting the circle, I cut them into quarters on those lines. And for fun, switched the colors around so now each new block would have a part from the original circles. With the addition of a 1 1/4" sashing strip and a black center,

Saxon circle block by QuiltFabrication
I had the start of something interesting. 

Up on the design wall, there was still a bit too much background (sorry, no fore-thought to take a picture!), but little 4" scraps blocks that were made along with the circles came to the rescue. Making them into triangles, and placing them in opposite corners added what I was looking for.

Saxon block by QuiltFabrication

Put those blocks all together, and it makes for a great design!

Saxon circle quilt by QuiltFabrication

I love the lighter value purple inside the square, the combo of the teal and purple circles on the outside, and the teal triangles in the corners. Fantastic finish, if I do say so myself!!

Here's a few more closeups:

the circles,

Saxon circles

the quilting of a star pantograph,

Saxon star quilting

and the ever-so-lucky matching star backing.

Saxon star backing

I may make this again, maybe using solids, and possibly a bigger layout - we'll see, as I have a ton of other projects knocking at the door.

Happy Quilting!
Follow on Bloglovin

Monday, August 6, 2018

Cutting Multiple Pieces Trick

It's tutorial day today! This one is about cutting multiple pieces of fused fabric, saving a ton of time!


cutting multiple fusible pieces


While working on my Whatamelon runner, 


Whatamelon table runner by QuiltFabriction

I was faced with cutting many seeds and rind lines from fusible fabric. Normally, I trace my design onto the paper side of a fusible product, then cut around the shape 1/4" on either side of the traced line. This removes the center fusible portion, cutting down on the stiffness from the layers of fusible and fabric.

Ah, but these seeds are rather small, and not worth the time to use that technique. The amount of stiffness they'll have from being completely backed by fusible will hardly be noticed.


Whatamelon front and back

Now, I could have taken the time to draw up the seeds and have the die cutting machine do the work. But these are such simple shapes that I decided to tackle it by hand, using a slick trick for cutting out multiple pieces at once.

For this project, I had a printed template of two rows of seeds.
watermelon seeds

After cutting fabric rectangles to cover the template size and applying fusible, I was set for the magic!

First step, stack all pieces, making a fused-fabric/fused-fabric/template sandwich.
fusible fabric sandwich

My template for both the seeds and the melon rind lines are right side up. Therefore, the fabric should also be right side up. If the pattern is reversed, then the fusible will be right side up (fabric side down).

Using my 'Magic Stapler' (or just a standard stapler!), all layers are stapled together OUTSIDE of the pieces for applique. Nobody wants holes in their pieces for quilting!

stapling to cut multiple fusible pieces

By using as many staples as necessary to hold the layers together, I then cut away! Before I knew it, all my seeds were cut and ready to go.

So, the next time you have a lots of fusible pieces to cut, remember this magic trick!

Happy Quilting!

Follow on Bloglovin