Pages

Monday, July 29, 2019

Watermelon Wedges

Time to spill the beans on my secret project. Or in this case, maybe spit some seeds cause it's all about watermelons!!!


Watermelon Wedges by QuiltFabrication

Don't those wedges look like a cool, refreshing treat for this hot weather???

How about a little tutorial on making a watermelon wedge? Then enjoy them all summer long!


Watermelon Flesh

The flesh is the red part of the wedge, full of juicy goodness! I like my watermelon flesh red, as it's usually sweeter, and because this is quilting, I also like it scrappy - the more variety of reds, the better!

Grab 13 2.5" red squares, laying them out in two rows of four, then a row of three, and at the bottom, a row of two.


squares for watermelon flesh


Add in some seeds by first marking selected squares (see further below for which ones) 1" on the top, and 1.75" on the side.


adding seeds to watermelon squares

Then stitch a seed triangle, diagonally cut from a black 1.25" x 2.25" rectangle, from mark to mark on the red square. Press toward black, and trim out the excess.

The bottom row has 1 seed, the 2nd row, 2 seeds in the opposite direction, and the third row has 3 seeds in the same direction at the bottom row.


seeds in the watermelon flesh

Notice there's several squares stacked. I like to make many wedges at one time, completing each step for multiple wedges before moving to the next step. Just saves time!

Once the seeds are in, stitch rows together, pressing away from the seeds, alternating direction between rows.


rows of squares for watermelon flesh

Then stitch those rows together, lining up the seam of the bottom row with the middle of row 2, and lining up the center seam of row 3 with the middle of row 2. This is important for trimming later.


complete watermelon flesh from 2.5 inch squares

The watermelon flesh is finished - time to move on to the rind.


Watermelon Rind

White Rind

Watermelon flesh tends to turn pale in color at the rind, and is often shown as white in drawings. I chose to do the same here, adding the white rind portion in three parts to shape the top of the wedge.

Trim the right side of the flesh from seam to seam, leaving a .25" seam allowance.  


trim right top edge for watermelon rind

Stitch on the first rind piece, a white .75" strip. Press.


first white rind piece to watermelon flesh

The white ends up being pretty narrow, same as if in a real watermelon.

Then measure .375" from the top, marking a line. Place the next strip, another .75" white piece, on the line and stitch in place. Don't trim anything yet!


top white portion of watermelon rind

Press, and trim the left side, again from center seam to side edge seam leaving a .25" seam allowance.


trimming for left side of watermelon rind

Now trim away the excess behind the center piece, and stitch another .75" white strip to the left.


stitch remaining white rind portion

Trim away all the overhangs for a nice shaped top, ready for the green rind portion.


Green Rind

On the left, stitch a 1.25" green strip. Press. Trim the green even with the white strip at the center. Do not trim anything along the outer edge.


adding first green rind piece to watermelon wedge

Add on a 1.25" green strip along the top. Press. Trim the green even with the white strip on the right.


adding center green rind piece to watermelon wedge

Finally, add a 1.25" green strip to the left. Press and trim the remaining green edges even with the other rind parts. The unit measures approximately 9" tall. 


final green rind on watermelon wedge


Watermelon Wedge

To turn this unit into a mouth-watering watermelon wedge, it needs two final cuts. There's two ways to do this, either with a Hex n More ruler (affiliate link), or a 6" x 12" ruler (affiliate link).

If using a Hex n More, mark a center line with a piece of tape. Then line that up with the center seams on the watermelon flesh, leaving .25" at the tip for a seam allowance.

If using a 6" x 12" ruler, line up the 30 degree line with the watermelon flesh center seams, again leaving a .25" seam allowance at the tip. Trim, and repeat for the other side.

final trimming for a watermelon wedge

And look at those freshly cut watermelon wedges, ready for any project! I've had so much fun making these, that I have two projects using them. I'll have a table runner to show on Friday, and a big quilt to show next week.

pieced watermelon wedges

Both will have patterns available, as they are very different. Each pattern includes more detail on watermelon wedge construction than what I've given here, plus making them into blocks. Until then, enjoy every bit of this refreshing summer fruit!!

Happy Quilting!


Follow on Bloglovin

Friday, July 26, 2019

The Accurate Quarter Inch Seam

Recently, I've seen a few quilt blocks and tops in which the quilters think they're sewing a quarter inch seam, when in reality they are not. And since I'm working on a project that requires an accurate 1/4" seam, I think it's a good time to go over how to accomplish that.


The Accurate Quarter Inch Seam tutorial


Cut Accurately

The first step in accurate, easy piecing, is to cut the fabric accurately. Not a smidgen bigger or smaller - cut the size required. Here, my project calls for 2 1/2" squares.

2.5 inch squares for quilt piecing

Use a Quarter Inch Foot

Most sewing machines come with a 1/4" foot, or allow the needle to be moved side to side for adjustments. My machine has both, and I move my needle a few spaces to the right to achieve that quarter of an inch between the needle and the fabric guide.

quarter inch between needle and fabric guide on the sewing foot

Measure the sewn unit

The final test of an accurate 1/4" seam is to measure the finished unit. Press the seam to one side, then measure the unit. Remember that seams always take up 1/2". In the photo, two 2 1/2" squares sewn together results in a unit that is 4 1/2" wide.

accurate quarter inch seam

If that unit is too short or too long, first double check the cut size of the pieces. Then go to the machine and adjust the needle. Can't move that needle any more? With the help of a ruler, place a piece of tape on the machine bed to mark where the fabric edge should be. Then sew and measure the unit again. Keep adjusting the needle (or tape), and checking the final unit until an accurate 1/4" seam is achieved.

With all of those accurate seams, enjoy having block pieces that fit together easier, taking a lot of frustration out of quilting. 


Follow on Bloglovin

Monday, July 22, 2019

It's Christmas in July!

Welcome to day 9 of the 12 Days of Christmas in July Blog Hop, hosted by Sarah at Confessions of a Fabric Addict. I chose to create snowflakes using my Holiday Stars pattern in blue and silver this year, 

Holiday Star snowflake version by QuiltFabrication

with a set of place mats and a runner for an elegant winter dinner party!

Simple to make, these went together super fast! Plus the pattern is suitable for any holiday, as I originally made Holiday Stars for the 4th of July. Oh so versatile!


Holiday Star patriotic version by QuiltFabrication

For a complete pattern, full of fabric quantities, cutting instructions, and sewing diagrams, the Holiday Star place mat/runner pattern is available in my Etsy shop.

So, let's have a closer look at the snowflakes, both pieced, 


Holiday Star snowflake version place mat by QuiltFabrication

and quilted with swirly snowflakes!

Holiday Star snowflake quilting by QuiltFabrication

Here's the quilting on the backside - oh so pretty!


Holiday Star snowflake quilting backside by QuiltFabrication

And the runner is adjustable, as it can be made longer if necessary - just add more star blocks. Since my table is small, I opted for two blocks to have enough room for the place mats.


Holiday Star snowflake runner by QuiltFabrication


Merry Christmas!


Follow on Bloglovin

Friday, July 12, 2019

My Chickens Have a House

I got a chance to play with my personal Round Robin, featuring the chicken panel, and had so much fun creating that I have to share - my chickens now have a house!


full chicken coop quilt center by QuiltFabrication

Did you guess this was coming from the sneak peek on Wednesday? How about walking with me through this burst of creativity to see how it's made?

First, the hen house image I was inspired by. Mine's got the elevation and the little ramp, but minus the doors for piecing's sake!


With a quick glance in my brown drawer, I found two fabrics that worked well to continue the landscape around the chickens - lucky!! Plus a red for the barn, and maybe a green for the roof.


initial fabric pull for the chicken coop

A bit of curved piecing created some interest to the ground under the house itself,


curved piecing for the ground

and with the addition of posts and the ramp, the outdoor area started coming together.


chicken coop's outdoor area progress

Now, our first round of this Round Robin should contain the following: pinwheel or something from nature. Paying homage to barn quilts, I mounted a pinwheel at the top of my hen house.


pinwheel barn quilt

Then added the roof, though tying the house to the outdoors and the sky was a bit of a puzzle. I got it figured out even though I had to trim the house down a bit.


chicken coop needs the sky

Now for the really fun part - the details! What hen house wouldn't be complete without a nest?


fabric strips for a straw nest

Lots of 2" fabric strips are randomly plopped at the open door to form a nest. Straight line stitching winds its way through the straw, catching pieces here and there to hold it together. That way the straw stays free, keeping a 3D effect, since this quilt will be a wall hanging.

And of course there's got to be eggs!


chicken eggs in the nest


Stitched onto a fusible, the back was slit to stuff in two pieces of batting - more 3D!


stuffing the backs of eggs

They were then stitched down, only along the bottom, in the nest area, so that it looks like their standing away a bit from the quilt. Couldn't resist the jealous hen eyeing those eggs!


hen eyeing those eggs

One last thing to blend the chicken panel in with the rest: hand cut flowers from leftover fabric from the panel's border. Then they're stitched down, no fusing, and painted. Also painted the small portion of ramp behind the tail feathers, to make a continuous line.


hand cut and painted flowers to hide piecing line

These few small details really complete the illusion, hiding the piecing line between the panel and my pieced background. Check out the before picture below.


visible piecing line before the additional flowers


full chicken coop quilt center by QuiltFabrication

This has been a big hit with my family so far, and hubby is ready for it to be done. But there's a few more rounds to go, which will be more rows than rounds. Wonder what I'll dream up next month - it's quilters choice.

Happy Creating!


Follow on Bloglovin

Friday, July 5, 2019

Straight Line Stipple Quilt Fill

Today it's about the quilting on the Holiday Stars place mat -


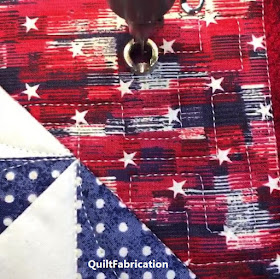
Straight Line Stipple on the Holiday Star place mat by QuiltFabrication

I'm calling it a Straight Line Stipple.


Straight Line Stipple on the Holiday Star place mat


Here's the basic idea: meander through the area to be filled using lines in parallel and perpendicular - no angles.


Straight Line Stipple quilt fill drawn out by QuiltFabrication

Add dimension by changing the line of stitching, creating open boxes here and there. Notice there's no crossing over on any of the lines - this is a geometric take on the traditional stipple. And don't worry about maintaining an exact distance between the lines. As long as the overall density stays consistent, it will look great!

For my place mat project, the space between lines is anywhere from 1/8" to 1/2". For a larger space to fill, the spacing could be somewhere between 
1 1/2" to 3". It's all up to what the quilt (and quilter) want.

Here's a video to see the Straight Line Stipple being stitched, using backtracking within the ditch to move through the space.


Quite a fun, easy, modern fill, suitable for a domestic or longarm machine, and perfect for a variety of quilts. Enjoy!


Follow on Bloglovin

My Favorite Patterns