I ended up making 4 for the party, then decided to use up some old purple fabric and make a full quilt, but more on that later.
After making a bunch in purple, I contacted guild member Amy, the presumed designer, about putting out a tutorial for this block cause it's just so easy!
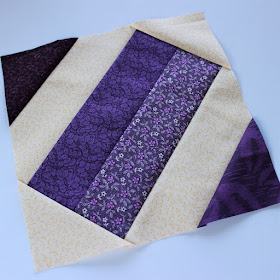
She told me she had redesigned a Missouri Star Quilt Co block, called Brick Yard. The technique shown is fast and easy, especially if using long strips.
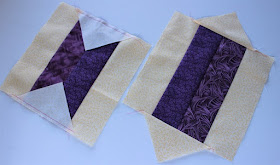
Ah, but Amy's version uses scraps, measures 9" versus MSQ's 8.5", and doesn't lose the corners of the center unit when sewn with other blocks. Personally, I like Amy's version better!
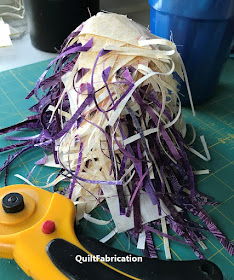
But it does have a bit too much fabric waste for me. So, I did a bit of measuring and substituted a triangle for a strip on the corners. Much less fabric waste now, just tiny strings and a small background triangle. Check out this pretty trimming pile from 48 blocks - it's art in itself!
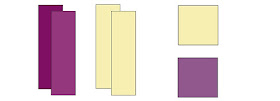
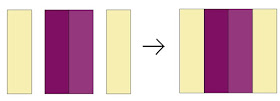
So, how about a tutorial on making a scrappy, redesigned Brick Yard block? The first couple pictures are drawn cause I didn't think to take pictures till later in the sewing process!
9" Brick Yard quilt block, scrappy version tutorial
Cutting2 (two) 2.5" x 8.5" strips of coordinating prints
2 (two) 2.5" x 8.5" strips background
1 (one) 4" x 4" square print
1 (one) 4" x 4" square background
Sewing
Stitch 2 (two) 2.5" x 8.5" strips of coordinating prints together along the 8.5" edge.
Add 2 (two) 2.5" x 8.5" strips background to each side, pressing toward the prints or center.
Cut both 4" x 4" squares on the diagonal.
Fold each triangle in half, pressing a mark in the seam allowance. Do the same with each 8.5" strip unit, as shown.
Stitch each background triangle to the print ends, matching both the triangle fold and triangle point with the center seam.
Repeat the process with each print triangle to the background side strips, matching the triangle fold with the fold at the center of the strip. Hint: finger press the fold mark on the strip unit, with right sides together. Press the fold mark on the triangles with wrong sides together. Then the folds will nest!
Finish by aligning a square ruler's diagonal with the center seam, trimming the block to 9" x 9" square. Then stand back and admire your work!
Have fun with this, making up different color combinations, and using up those scraps. I'll have more to show on the progress of my purple, scrappy version of Brick Yard on Monday.
Happy Quilting!

My Favorite Patterns







Love this block!
ReplyDeletethat is pretty much how I made my signature quilt blocks except I have 3 rectangles in the middle. It is an easy pattern to make and squaring them up in the end is easy.
ReplyDeleteThat is a cute block! Thanks for sharing.
ReplyDeleteI like this scrap busting block very much and am looking forward to seeing your purple quilt made using these blocks. Thanks for sharing!
ReplyDeleteThanks for sharing this block. The scrap pile in my sewing room will certainly diminish!
ReplyDeleteGreat block - thank you for sharing how to make it!
ReplyDeleteHi Susan! Great tutorial and great finished block at the end. I like the idea of not losing the points on the center block. I've PINned your last picture to remember the inspiration. Happy Saturday. ~smile~ Roseanne
ReplyDeleteWhat a great block. Thanks for sharing.
ReplyDeleteI never have success doing the 'snowball' corners. I like your method of cutting squares into triangles and then attaching and then trimming. It may be a bit wasteful of fabric but more successful in the end. Thanks for providing the pattern.
ReplyDeleteThis comment has been removed by a blog administrator.
ReplyDeleteThis comment has been removed by a blog administrator.
ReplyDelete