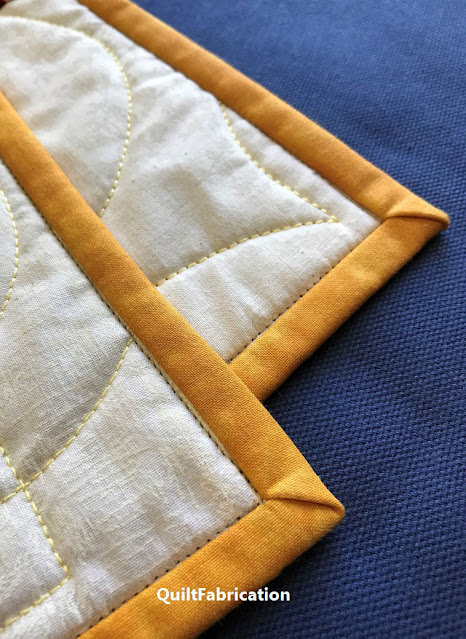
All that's needed is a simple change in stitching the binding at the corner, a snipping of a bit of fabric, and that corner binding will fold nicely, making flat, beautiful quilt corners!
I learned this fabulous binding trick several years ago, and it's how I finish all of my binding corners. I've demonstrated this technique several times to members of my guild, most recently via a Zoom meeting. After several quilters tried it, many raved and excitedly thanked me for sharing how easy it is to now make beautiful corners - this corner binding trick is certainly all the rage!
Having recently posted my favorite binding tutorials, in the written-with-photos form, I thought of an even better way to share them: by making a video! With a video, it's more than a front row seat - it's the opportunity to see exactly how I'm demonstrating the technique, right on my own quilts. How awesome is that??
Have a look at the first video in the binding series, How to Reduce Bulky Quilt Corners - Step by Step. It's full of up close, detailed video footage showing how to sew the binding at the corner, and clipping the excess fabric. Just check out those beautiful flat corners in the picture!
I'm excited to bring my tutorials to video, to share with everyone quilting techniques that not only save time and frustration, but to also show new or different methods to advance everyone's quilting skills.
And now it's time to share! Here's the link to How to Reduce Bulky Quilt Corners - Step by Step video! Feel free to share this with your quilt friends, and please consider subscribing to my YouTube channel. There's more quilting tutorials I plan to share!
Happy Quilting!

My Favorite Patterns


