Pages

Friday, July 31, 2020

Reindeer Wreath

Welcome to Christmas in July! I'm going to celebrate Christmas this year with a Reindeer Wreath full of Santa's crew, and featuring Rudolph front and center!  Check it out at https://www.etsy.com/listing/833335670/reindeer-wreath-christmas-wall-hanging

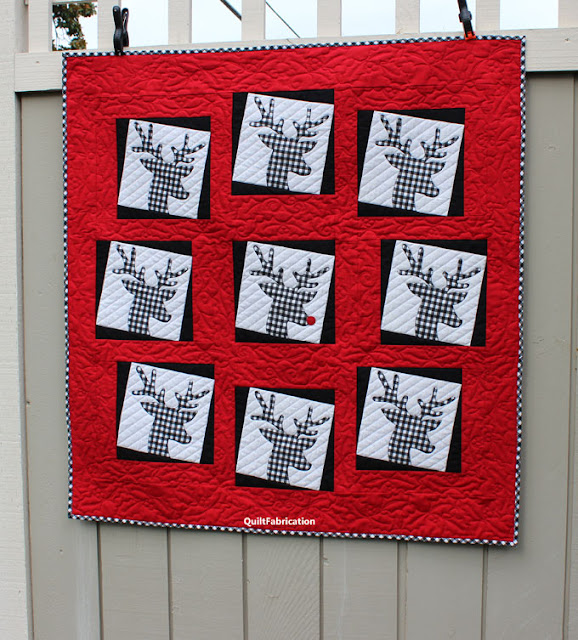
black and white checked deer heads in a circle with Rudolph in the middle all on a red background by QuiltFabrication


Yes, Rudolph and the gang make up this fun wreath of deer appliques of black and white checks, set in red to match Rudolph's nose! Holly and berry quilting motifs complete the wreath idea.

closeup of holly and berry quilting motifs done by QuiltFabrication


This adorable quilt is newly designed for the Christmas in July Then and Now blog hop, hosted by Carol of Just Let Me Quilt.  See https://www.justletmequilt.com/2020/07/christmas-in-july-then-and-now-blog-hop_27.html

christmas in july then and now blog hop


I've teased everyone plenty over the last week or so, especially with the Tips and Tricks for Fusible Applique tutorial, https://www.quiltfabrication.com/2020/07/tips-and-tricks-for-fusible-applique.html. Has anyone noticed the deer are looking to the right in this quilt? Due to a last minute layout change, the deer I used for the tutorial was set aside and new heads made looking right. It was definitely the right decision!


red, black, and grey reindeer wreath wall hanging by QuiltFabrication
 

Though the holly and berries look like a freehand design, they were actually quilted with paper templates. With the templates, I could lay out the design on the quilt beforehand, even adding a few extra leaves or curls here and there to fill empty space. Check out this short video, https://youtu.be/eShxHm087kU showing the quilting with paper templates, which can be done with either a domestic or longarm machine - easy peasy!


rudolph the red nosed reindeer


Being that the Reindeer Wreath is just so charming  - I had to make a pattern! Not only is the pattern beginner friendly, with a full size reverse deer template, detailed instructions, and quilting ideas, but it is also at a blog hop special price right now through Friday, August 7. Get the pattern now at https://www.etsy.com/listing/833335670/reindeer-wreath-christmas-wall-hanging so there's plenty of time to finish for Christmas enjoyment!  

Since this is a Christmas in July Then and Now theme, and I've covered the now - let's move onto some then. These are just a few of my past favorites:


green pinwheels with red and white stripes for a table runner by QuiltFabrication


black and green striped trees on a red and white background for a table runner by QuiltFabrication


three snow covered black bird feeders with 5 red cardinals in the snow by QuiltFabrication

I certainly do like a lot of red for the Christmas holiday! Of course, I've made several others for Christmas, but there's too many to list here - check out my Etsy Winter page see some more. 

And don't forget to stop by all of the other quilters sharing their Christmas Then and Now projects:

                                                                                July 31

For a full list of the entire week, visit Carol at Just Let Me Quilt:  https://www.justletmequilt.com/2020/07/christmas-in-july-then-and-now-blog-hop_27.html 
 And thanks again, Carol, for a another fun blog hop!

Happy Quilting and Merry Christmas!


Follow on Bloglovin

My Favorite Patterns

Monday, July 27, 2020

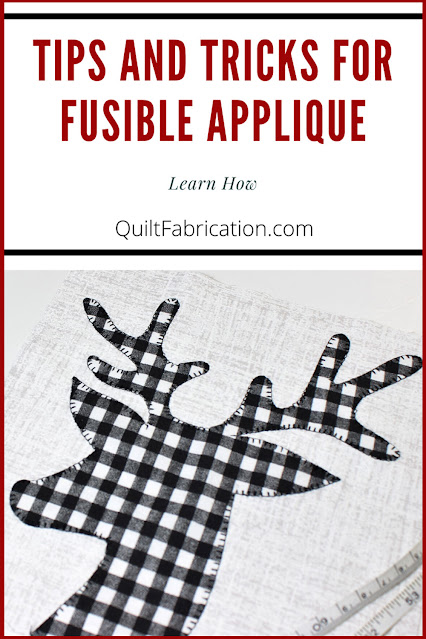
Tips and Tricks for Fusible Applique

Applique, by definition, is to decorate a large piece of fabric with other pieces of fabric to form pictures or patterns. It allows quilters to create intricate designs, whimsical creatures, and even modern art - that's how wonderful applique is. By far, the easiest and fastest method is fusible applique, and with the following tips and tricks, it's even easier! 
Click on the picture to see the video


black and white check deer head on grey background for tips and tricks for fusible applique tutorial by QuiltFabrication
 

Tips and Tricks for Fusible Applique Tutorial


Trace the reverse of the pattern

Before tracing any design onto paper backed fusible web, be sure it is the reverse of the design.
Fusible web is always applied to the wrong side of the fabric, which means when the piece is turned to the right side, it reads in the correct orientation. This is especially important for lettering!! Below, the deer pattern looks to the right, and is traced the same, but on the finished piece, he will look to the left.


fusible web with deer head drawn on paper side by QuiltFabrication

Rough cut a 1/4" on the outside and inside of the tracing

Cut out the fusible tracing, 1/4" away from the line, on both the outside and the inside. It doesn't have to be perfect - just leave enough to secure the line when fused.


rough cutting around the drawn deer tracing on fusible web  by QuiltFabrication

Why cut out the inside?  It reduces the stiffness associated with fused fabric, and allows for the background to be cut away.
 
Tip: when cutting multiples of the same shape, staple them together - see the fusible applique video for more!

Add alignment marks for fussy cutting

I'm placing several deer on a plaid fabric and want them to look the same. By adding alignment marks to the fusible tracing, I can successfully achieve that. Check out this tutorial, Creating Identical Fussy Cut Fusible Pieces, for more detailed instructions.

fussy cutting alignment marks made on fusible web deer head drawing  by QuiltFabrication

Follow Manufacturer's directions for fusing

I can't say this enough - follow the manufacturer's directions for both fusing onto the wrong side of fabric, and for the final fusing. Each is different! The fusible I use requires 5-8 seconds with a hot, dry iron for fusing to the fabric wrong side. Too little, and it won't fuse; too much and the glue melts, leaving nothing behind. The final fusing requires a damp press cloth, a iron set at wool, and 10-15 seconds. Quite different, so be sure to follow the directions!


line up aligning marks on wrong side of fabric before fusing  by QuiltFabrication

Cut out applique on the line

Once the first fuse is done, carefully cut out the applique piece on the drawn line. This is the final shape that goes on the background.

fusible applique deer head is cut out on the drawn line  by QuiltFabrication


Prepare the background

Size
It should be noted that applique stitching tends to shrink the background. I recommend cutting the background 1/2" bigger all around, completing the stitching, then trimming the background to the final size.

background quilt block made half inch larger before applique is fused  by QuiltFabrication

Placement
Several methods can be used for placement on the background:  a light box with the pattern underneath the background; folding the background in half in each direction and making light creases to mark the center; or using a ruler to measure from the background edge to the applique. View the Tips and Tricks for Fusible Applique video to see these in action for the deer applique.

Final Applique Fusing

Once the applique is placed on the background, it's time to fuse it down! Follow those manufacturer's directions for successful fusing. 

black and white checked deer head on grey background  by QuiltFabrication


Applique Stitching

There are numerous stitches available for finishing applique pieces. The most popular are a blanket or buttonhole stitch, zigzag, or a straight stitch. It's completely up to you, as is the choice of thread, both in weight, material, and color. I recommend testing threads, stitches, and tension settings on scrap fabric before starting the stitching on the final project.

Final Trimming

The very last step in applique is to trim not only the background to the proper size, but to also trim out the excess background fabric behind the applique. Remember the section of his head and neck that was trimmed out of the fusible web? Now it's time to remove the non-fused fabric in that same area, to reduce fabric bulk.

If you're lucky enough to have an applique with an open edge at the background edge, it's easy to cut out the excess. In the deer's case, the bottom edge is fused, meaning I need to cut a slit in the area to remove. By just pulling the applique and background fabrics apart in that spot, I can clip the fold enough to get a scissor in to trim along the line of fusible.

background fabric behind deer head applique being cut out  by QuiltFabrication


He's finished and so are the tips and tricks for fusible applique

tips and tricks for fusible applique with a black and white checked deer head by QuiltFabrication

Until next time, 
Happy Quilting!
Susan


Follow on Bloglovin

My Favorite Patterns

Friday, July 24, 2020

Sunflowers and Ladybugs

I had so much fun playing with the color palette generators the other day that I couldn't stop myself from picking different areas of that sunflower picture to see the palettes that popped up. Check out this new one with hand-picked colors of brown, dark green, yellow, red, and beige - pretty, right?

sunflower color palette that includes green, brown, yellow, red, beige

And then it dawned on me. Without knowing it, I had used that palette when I designed the Sunflower table runner, purchasing the red, brown, and yellow fabrics on one LQS shopping trip because they played so well together. 

sunflower and lady bug quilted table runner by QuiltFabrication


More Sunflower Color Palettes

With all of that playing, it sent me down the road of finding more sunflower pictures. What do you think of these for sunflower palette inspirations?

yellow sunflower and fushcia flower color palette


yellow sunflowers in white vase with aqua background

 
Notice that I have chosen pictures with the unexpected in them, like the fuschia flower next to yellow, or the yellow backed by aqua. Not your usual sunflower pictures, that's for sure - more on that later.

Ladybug Color Palettes

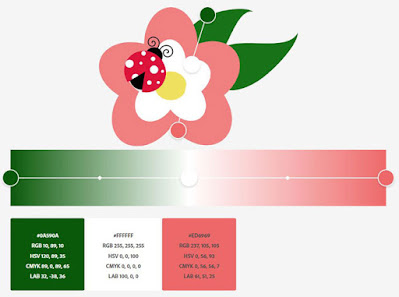
Here's a few more palettes to share, but instead of sunflowers, they're based on ladybugs. The first one is simple, just three colors pulled from this graphic.

coral white and yellow flower with green leaves and a red ladybug on top


Adding two more color gradients to the mix, plus hand-picking the colors, results in this.

five color palette of black, white, coral, yellow, green


Quite striking, and reminds me of my Ladybug Dance wall hanging, though I chose more red than coral and eliminated the yellow.

ladybugs and flowers with black and green accents in Ladybug Dance wall hanging pattern by QuiltFabrication


More Ladybugs on Flowers

How about these? Here it's the same picture of a ladybug on blue flowers, but depending on the colors picked, results in two different palettes, both quite lovely.

red ladybug on blue flowers for two different color palettes by QuiltFabrication


And one last ladybug, this time on purple thistle. The first one is quite lovely with two greens, red, purple, and a neutral beige.

ladybug on thistle color palette of two greens, red, purple, and beige

But if the dark green is substituted with the black/grey (or even a dark blue) from the ladybug's spots, then an even more lively color palette evolves.

Ladybug on Thistle color palette with green, dark blue, red, purple, and beige by QuiltFabrication

I'm really loving that one - how about you?

Choosing Photos for Color Palettes

Have I given you color overload today? The week started with 3 Ideas for Finding the Perfect Color Palette, which includes a list of my favorite palette generating programs, and concludes today with generating your own from any of the stunning photos found on the web. 

And notice I say 'stunning photos', those whose color compositions that are already exciting. I could have chosen a clear, crisp photo of a sunflower against a blue sky, like this one.

yellow sunflower with green leaves against a blue sky

But I know what I'm going to get - bright yellow, orange, dark green, and blue. Sure, that's okay, but really not very exciting, and not worth my time putting it through one of the palette generator programs. With the other photo examples from above, I specifically chose those photos because they had unexpected color pairings - yellow with aqua; purple with yellow and brown; red with light blue. 

For fun, I'll pull out my favorite color wheel tool, The Ultimate 3-in-1 Color Tool (or any color wheel tool),

ultimate 3-in-1 color tool for color design


and I see that yellow and aqua are two legs of a triad, as are purple with orange-yellow, and red with blue. Now isn't this all starting to make sense? These colors are destined to be together, though we don't realize it. And that's what makes these photos stand out.

To wrap this up, color palettes are numerous for any given photo. It just takes a great photo, and the willingness to pick colors for a pleasing palette. I hope I've inspired you to study color more closely, and to seek beautiful, inspirational color palettes. It's those bits of unexpected that will make a beautiful quilt!

Happy Quilting!


Follow on Bloglovin

My Favorite Patterns
Monday, July 20, 2020

3 Ideas to Find the Perfect Color Palette

Who of us hasn't gone to the quilt shop and needed help putting together fabrics that will make a quilt go from ho-hum to WOW? Choosing fabrics and colors can be such a struggle, one we've all been through at some point in our quilting journey. But it doesn't have to be.

three ideas for finding the perfect color palette for a quilt

Though I'm certainly not an expert at choosing colors, there are a few tools I find extremely helpful in finding a color palette for my quilts. Let's take a look, starting with the easiest.

Use the Color Scheme in a Favorite Fabric

This idea is so simple! We all have favorite fabrics in our stash, full of beautiful colors, those that really speak to us - otherwise we wouldn't have bought them. Well, it's time to pull those out for color inspiration! That's what I did when choosing the color palette for Zen Garden.

green gold red orange fabrics for a quilt


Though that floral print in the upper left corner is a really old print, I just love the warm, rich colors in it, and pulled fabrics using those colors as my inspiration. I tend to look at the colors in the print, but fabric manufacturers make it even easier by printing color palette dots in the selvage. 

printed color palette in the fabric selvage


Once a group of fabrics are put together, the initial inspirational fabric can be included in the final quilt, or not - it's your choice. I recently found the fabric seen above at a local LQS and love the palette, but I'm really not interested in using the fabric in a quilt. Right now, I'll file this palette idea away for another time.

Note: when fabric shopping, if you see a color palette you like, but maybe not the fabric print, take a picture of the selvage palette. Then you can start building your own personal library of color palettes to draw upon for future inspiration.

Use a Pre-designed Color Palette

Just as palettes are on fabric, an already made color palette found online is another great option. There are a ton of websites, some of them better than others, devoted to pre-designed color palettes.  A couple of my favorites are:

This site is fun to use - just hit the space bar to generate a new and different palette - tons of palettes to be inspired by.

tan cream red black brown color palette randomly generated by coolor.co
 

This particular page of their site offers a wide range of colors to start with. Choose one, then choose monochrome, analogous, contrast, or triad for additional colors that play well with the chosen color.

seafoam green color palette from shutterstock


Or, choose any of the 101 pre-designed color palettes that Shutterstock offers - there's plenty here to get excited about. This one, called Grunge Graffiti, is another I'll add to my palette library.

grey blue sienna eggplant color palette from grunge graffiti


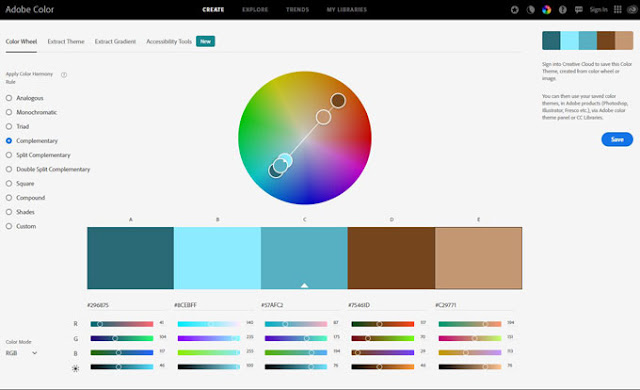
If your skills are a bit more advanced in using the color wheel, then create a palette using Adobe's Color Wheel. Settings for a palette theme include analogous, monochromatic, triad, complimentary, split complimentary, double split complimentary, square, compound, shades, and custom. That's a lot to play with!

three values of teal and two of brown for an ocean themed color palette from Adobe color wheel


And one site that's a particular favorite is iColorPalette.com. Clicking on 'Color Palettes' in the header bar reveals a list of pre-designed palettes by color or by theme. I love the theme palettes, as there are pages and pages of palettes, all based off of pictures - what better color inspiration is there than a picture!

beach color palettes from iColorpalette.com

Pull Colors from a Photo

As seen above, pictures are always a great way to find color palettes. And again, there are a ton of sites that will pull out the colors from a photo, providing an instant color palette. As a member of Canva.com, under 'colors', there's four places to get ideas: a palette generator, palette ideas, color wheel, and the meaning behind colors. All do a nice job, but the palette generator only returns four colors, not five like most of the others. I was a bit disappointed that the generator did not return the red from this picture.

four color palette generated by Canva from sunflowers

  
But over at iColorPalette.com, the uploaded image returned a beautiful color palette that included the red, which I saved for future use.

red yellow green and amber color palette from sunflower picture and icolorpalette.com


Coolors.co/image-picker can also make a palette from a photo, with an option of increasing or decreasing the number of colors in the palette. 

coolors.co sunflower color palette


Adobe.com/create/image-gradient will also pull colors from a photo, though you get to choose which colors to pull by moving the circles around. For me, that's a bit more work!

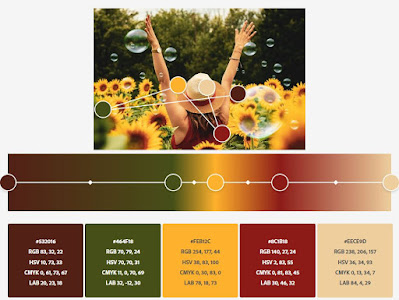
cream red yellow green sunflower color palette from Adobe image gradient


Isn't that a lot of great resources to use in choosing color palettes for quilts? Fabric shopping will be so much easier now with a color palette in hand, and the confidence to choose fabrics in colors that go well together. Start making it a habit of creating and collecting color palettes for beautiful quilts. And if you know of more color palette sites out there or have any favorites, let us know in the comments.

Happy Quilting!


Follow on Bloglovin