Pages

Monday, August 31, 2020

Gone Camping Quilt Update

My son's birthday has passed, and his camping quilt is at least a top, but remains unquilted. It's really ok that he didn't get to unwrap it on Sunday, mainly because he was off in the hills with his girlfriend. He's knows he'll get it eventually :)

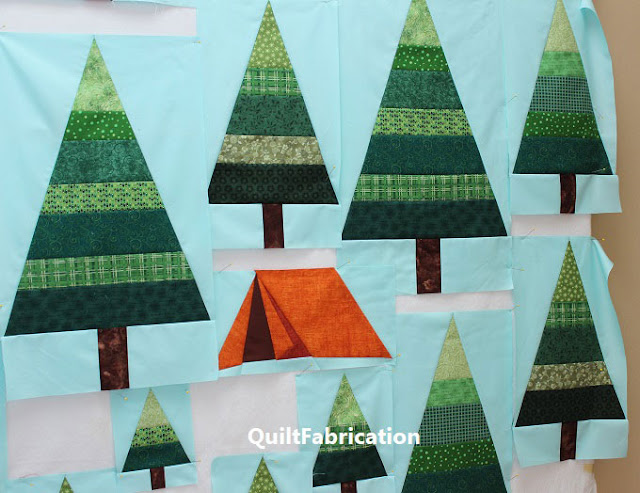
green striped trees on aqua background with an orange tent by QuiltFabrication

You can see the blocks are made, and all that's left to do is the to put the spacers between them.

Zoom forward a week, and the blocks with spacers are now a top.

green striped trees with an orange tent for a quilt pattern by QuiltFabrication

Don't you just love that tent? It's in my son's favorite color - orange. And if you look at the full tree on the very right, the olive green fabric is one of two fat quarters he brought back for me from a recent backpacking trip in the Grand Tetons. No, there's no quilt store there, but he found one on the drive home, and was sweet enough to stop, even calling me to ask what color I wanted.

Note: check out my video tutorial on paper piecing the tent:

https://www.youtube.com/watch?v=rwPB0L4z6vs


So what's held this quilt up from getting finished as a birthday present? 

Part of it is the water feature he requested, because one always tries to camp near a water source. 

First, I made a lot of beach going one direction. Then decided I didn't like that, so I went back to my original drawing with a smaller beach slanted in the other direction. Better. (Sorry, no pics!)

Then I decided I didn't like the fabric choice for water. Though it was a pretty water-like batik, complete with waves, the value was too dark. Sure, I'll put water in as he requested, but it drew attention away from the tent. Because...


This quilt is all about the tent, being out in the wild, alone with nature, and finding peace. It represents a time and place to escape from all the craziness around us.


Enough said.

So with that in mind, the water is now a quieter blue, to represent a still lake, not some rushing river. I'm off to finish up this quilt, and writing the pattern so others can have a wilderness escape.

Happy Quilting!


Follow on Bloglovin

Enjoyed this post? Don't miss out - get posts delivered directly to your inbox with follow.it.  

           
GET POSTS BY EMAIL

My Favorite Patterns

Friday, August 28, 2020

How to Join Quilt Binding Ends

Listen up quilters - here's a tutorial that will make you one happy quilter! 

No matter your skill level, today's tutorial is all about joining the ends of quilt binding using a super quick and easy method. It's guaranteed to take away any confusion, hassle, or headache that you've ever experienced in the past, and turn quilt binding into a pleasurable part of the quilting process. 

black and white check binding ends stitched together

There's no complicated measuring or confusing angles to deal with. Once you learn the process, it will become second nature, changing your quilting life forever!

Not only is joining binding ends in the written format below, but it can also be seen in action, with the video 'How to Join Quilt Binding Ends - Step by Step.'


How to Join Quilt Binding Ends

Start with a fold

Prepare binding strips, cutting 2.5" WOF strips and joining on the diagonal. Square off one end.

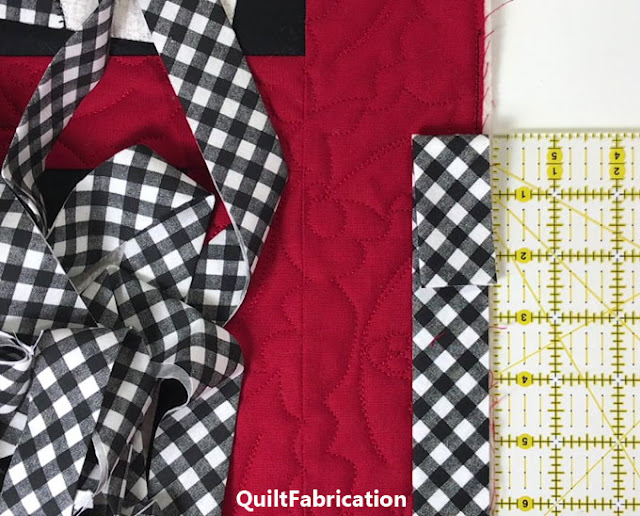
Fold back the squared off end 2.5" and pin to the side of the quilt. If using a narrower binding strip, 2.25" for example, fold back that measurement and pin.

fold over binding the width of the binding strip


Leave a 6" tail

Start stitching the binding to the quilt approximately 6" away from the fold.
Continue around the quilt. Tip: use the reducing bulky corners technique at each corner for flat, square corners. 

Stitch to within 6" of fold

Stop stitching to within 6" of the fold. This gives another 6" tail at the end, which is 12" of working space to join the binding.

black and white check binding stitched to a quilt


Cut the end binding at the fold

Lay the end binding along the quilt and on top of the folded beginning binding. Cut the end binding where it touches the fold. Tip: cut the end binding 1/8" short of the fold for a better fit along the quilt.

black and white check binding being cut


Open binding for joining

Open the end binding piece, laying it flat and right side up. Open the beginning binding piece, laying it on top of the other, right side down. Align the top and side edges.

quilt binding right sides together


Stitch on the diagonal

Join the ends by stitching on the diagonal from the upper corner to the lower corner of the piece underneath. Draw a diagonal line if necessary.

binding stitched on the diagonal


Check the fit

Before trimming excess, check the binding's fit against the quilt. If all was done correctly, it should lay smooth and straight on the quilt. Trim out the excess, and finger press the seam to one side, or open if preferred. 

Finish stitching

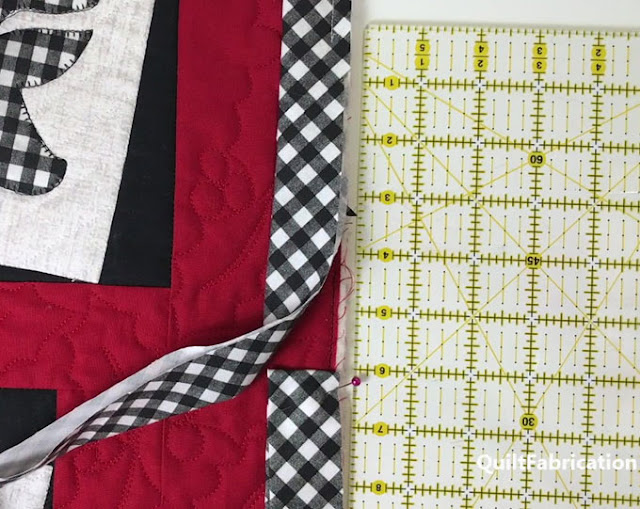
Pin the binding in place, and stitch to finish, overlapping the stitching by 1". Avoid letting the machine push the binding to the beginning stitching spot, resulting in a wrinkle. Tip: use a walking foot if necessary.

stitched down black and white checked binding


Wasn't that easy? Such a super simple method - it certainly changed my quilting life and I hope it does for you too. Now all that's left is to turn it to the other side and either machine stitch or hand stitch the other side - your choice.

Happy Quilting!


Follow on Bloglovin

Monday, August 24, 2020

A Splendid Reinvention of the Wheel

I've talked a lot about color this past month and have another color tool to introduce to you - the Foolproof Color Wheel Set (affiliate link) by Katie Fowler.

color wheel tool by Katie Fowler

I thank C&T Publishing for graciously providing this tool and the timing couldn't be more perfect. When it comes to color, most quilters can use all the help they can get!

This new Color Wheel Set is not only fun to use, but easy! The color wheel itself is a generous 8" in diameter and sports a hub in the center for mounting any of the 10 included discs. 

color wheel with an complimentary disc


Each disc has cutouts in relationship to the given color theory category: complement, triad, analogous, etc. There's even discs for double complement, double double complement, double split complement, and double triad - that's definitely some serious color schemes.

Katie Fowler's color wheel with ten black discs

The cutouts make viewing the relationships so simple, as compared to the color wheel tool shown below, with the somewhat confusing lines in the center. 


pocket size color wheel
 
All the cutouts certainly serve a purpose, but with so many on this color wheel tool, it can be hard to visualize the color relationships when some colors aren't covered up. 

With the Color Wheel Set, just pop a disc on top of the wheel and move it around to see the various color relationships without interference from uncovered colors. So much better!

split compliment color scheme of orange blue and green


I'm happily adding this tool to my growing collection of color resources, which include those from the 3 Ideas to Find the Perfect Color Palette, plus the two color tools used in the Purple vs Indigo vs Violet discussion. One can never have too tools!

Happy Quilting!


Follow on Bloglovin

My Favorite Patterns

Friday, August 21, 2020

How to Prepare Quilt Borders

A couple weeks ago, I quilted a quilt that had a small to moderate amount of wavy borders, a common quilt issue. I managed to conquer them, though a refresher course on the correct way to prepare borders is in order.


First, I'll go over what not to do, then move on to the tutorial for the correct way to prepare borders. When we're all done, say good-bye to those wavy borders! 

How NOT to Prepare Quilt Borders

Though tempting, AVOID the slap and sew method - cutting the border strips, stitching them to the sides and trimming off the excess on the ends, then repeating those steps for the top and bottom. Yes, I've been guilty of doing it this way because it's fast and easy. But this is a big cause of wavy borders. 


How to Prepare Quilt Borders

This method assumes that strips are cut from border fabric, applied first to the sides, then the top and bottom of the quilt top. Instructions for dealing with pieced borders are outside the scope of this tutorial.

Follow along with the diagrams to properly prepare quilt borders.

Step 1 - Press the Quilt Top

Thoroughly press the quilt top! And I mean 'press', up and down, not 'iron', sliding side to side. Inconsistent block sizes, bias cuts, extensive piecing, etc all effect the flatness and squareness of a quilt. 'Ironing' makes those issues worse and can also cause seams to get folded in the wrong direction. So, a good, thorough 'pressing' on the backside helps immensely.

Step 2 - Check for Square

Measure the length of the quilt top along both sides and in the middle. Do the same for the width. If either of the three length (or width) measurements are off by more than 1/2", fix and repair any piecing issues, or re-square the quilt by trimming before continuing.

                            Blue=quilt top         Red lines=measuring tape

Measure top to bottom for side borders;      side to side for top/bottom borders   


Keep in mind this is different than checking for square as is done in construction. That method compares the two diagonal measurements taken from corner to opposite corner, and is best used when blocking a quilt.

Step 3 - Measure for Borders

Take the average of the three measurements (left side, middle, right side) for side borders.

 Measure sides and middle

Step 4 - Cut the Borders

Cut the side border strips to the average measurement from Step 3. If extra length is needed for the borders, join strips together with a straight seam, on the straight of grain. 

DO NOT sew the border strips together on the diagonal, as this introduces a stretching point, resulting in a wave. 

  Straight seam=yes   Diagonal seam=no

Step 5 - Mark Matching Points

Fold border strips in half, mark with a pin. Do the same with the quilt top, folding it top to bottom to find the center along the sides. Mark with pins.

Fold both the quilt top and the border strips in half again, marking quarter marks. A good rule of thumb is to have marks no more than 18" apart. If the quilt and borders are long, keep folding and marking to achieve the spacing, and enough marks for matching.

Middle and quarter marks in black

Step 6 - Pin

Starting with the center mark, and matching other marks, pin the border to the quilt top, pinning every 4-6 inches. 

Black lines are matching lines

Step 7 - Stitch and Press

Stitch each side border to the quilt top. I usually have the border fabric against the machine bed to control the quilt's pieced seam direction. When finished, press the seam toward the border for a thinner seam. Pressing it toward the quilt top increases the fabric buildup, and fights the natural lie of the seam.

Step 8 - Top and Bottom Borders

Repeat Steps 3 - 7 for the top and bottom borders, measuring the top, middle, and bottom of the side-bordered quilt top. 

Measure top, middle, and bottom (Step 3)


Middle and quarter marks in black (Step 5)


                                  Completed quilt top with flat borders


Congratulations - stand back and admire those flat borders! Though the process involves a few more steps, I think you'll find wavy borders can be a thing of the past. 

May your quilts be flat and square!


Follow on Bloglovin

My Favorite Patterns

Monday, August 17, 2020

Purple vs Indigo vs Violet

Purple, the August RSC 2020 choice. Eager to jump in and not get behind, I pulled out the scraps and stitched up that pinwheel and a few spares in no time.

purple scrap pinwheel quilt block by QuiltFabrication

These are quite lovely, in deep rich purples, aren't they? 

While those purple scraps were out and scattered everywhere, I thought I'd go ahead and make the indigo and violet blocks, the 'I' and the 'V' for my rainbow version of Celilo. Keeping up with the ROY G BIV theme here.


indigo and violet scrap quilt blocks by QuiltFabrication
 

Looking good and scrappy! But I will admit, I had a bit of a color panic in choosing the right fabrics for indigo. 

So, what exactly is the color indigo? It's the color that sits between blue and violet in the visible spectrum, the 'I' of ROY G BIV (red, orange, yellow, green, blue, indigo, violet). It's toward the purple side of a rainbow.

rainbow with clouds

Personally, I think it's pretty darn hard to see, so I would lump it together with violet.

Being that I'm not much of a purple fan, I've never really given much thought to what's indigo, what's purple, and what's violet. It's all purple to me, with some fabrics having more of a blue cast, and others having more of a red cast.

But wanting to stay true to ROY G BIV for the Celilo quilt, I pulled out my favorite color cards for help.

3 in 1 color cards for choosing colors in the purple family

Though hard to see in this picture, indigo would probably be what they label as either blue-violet or violet. Notice it's not labelled indigo. And what they label as purple is more violet. 

Which leads me to think that those who designed the color wheel were thinking in a way that just makes so much sense. Now I know nature should rule, but the color wheel makes for fascinating study.

traditional color wheel tool

There's the primaries - red, yellow, green.

Then the secondaries, colors that result with the mixing of any of two from the previous list. That's orange (red+yellow), green (yellow+blue), and violet (blue+red). Notice that it's 'violet' not 'purple'.

Then there are tertiaries, the colors in between a primary and it's secondary. Starting with the yellow primary and adding green, we get yellow-green or add red for yellow-orange. For blue, adding green gives blue-green while adding violet yields blue-violet. For red, there's red-violet and red-orange.

The color wheel makes beautiful sense, to me at least. And it correlates fairly well with ROY G BIV, except that 'I' part. Did Isaac Newton need a vowel in there for it to make sense??

Comparing the two color systems, they each have red, orange, yellow, green, blue, and violet. But indigo on the color wheel? Where's that?

I suppose the case could be made for it to be blue violet, which is a tertiary color. If so, it's the only tertiary color in the ROY G BIV sequence. Such an honor, but so confusing!

Wanting to really have indigo represented in my rainbow Celilo quilt, I did a bit of searching for indigo examples. This block is probably the best, not quite blue and not violet (or purple, for that matter).


indigo fabric
 

Compare it to this violet example, which is closer to what we see in a rainbow.

violet flower

Ah, now I have some direction for sorting the indigo from the violet in my scrap pile. But alas, there's no indigo, only a bit of violet, and plenty of 'purple' in those scraps. It seems purple is the catch-all term for anything containing a mix of red and blue.

Now that I know what I'm looking for, I head to my 'purple' storage bins, searching for indigo, or fabrics with a leaning toward blue. And I find these:

indigo or blue violet fabrics

not blue, not violet, or even 'purple', but close enough to be considered indigo.

Happy to find what I was seeking, off I went to make both indigo and violet block parts for the rainbow of Celilo.

indigo and violet scrap blocks for Celilo


See the difference? Indigo on the left, violet on the right.

I feel so smart today, having taken the time to really examine ROY G BIV, the color indigo, and the color wheel. Now that I know just what indigo is, I'll search out those bluer 'purples' when putting together another rainbow quilt. 

In the meantime, when a quilt calls for purple, I'll probably still put the indigo and violet together in the same purple color family, as it's just easier that way. And if you look closely at the pinwheel block below, there's a wide range of color in there, though very little indigo. That's the separate block on the left.

purple scrap pinwheel block by QuiltFabrication


Feel free to lump your blue-purples and red-purples into one color family and call it purple - I won't mind. But if a rainbow quilt is in your future, stay true to ROY G BIV and take the time to search out indigo in your stash.

Happy Quilting!


Follow on Bloglovin

My Favorite Patterns

Friday, August 14, 2020

5 Must-Have Quilting Books

Need inspiration for quilt designs on your next quilt? Or maybe your looking to expand on the quilt skills you've already mastered, or want to learn new ones. Then look no further than my top 5 Must-Have Quilting Books. 

5 must have quilting books as suggested by QuiltFabrication


The list includes timeless books on free motion quilting to quilting with rulers, for both domestic and longarm machines. This list has something for every level of quilter, from novice to experienced, with ideas for quilting common blocks, using templates and rulers, and border ideas. These books are not going out of style any time soon!

For a peek inside the book, click on the links - there's usually several pages available for viewing to get an idea of what's inside. And there's a giveaway - keep reading!

5 Must-Have Quilting Books

1. Free-Motion Quilting Idea Book by Amanda Murphy (affiliate link)

free motion quilting idea book by amanda murphy

This book is at the top of my must-have quilting books. Amanda has put together lots of designs for commonly pieced blocks: churn dash, courthouse steps, drunkard's path, eight-pointed star, log cabin, irish chain, sawtooth, pineapple, kaleidoscope, and wedding ring just to name a few. The designs take the guess work out of what to quilt, providing ideas for numerous shapes and blocks. Definitely a book every quilter should own.

2. Shape-by-Shape by Angela Walters (affiliate link)

shape by shape quilting book

Angela, a self-taught modern longarm quilter, put together a book full of quilting designs for numerous pieced shapes. Though an older book, I still consider it one of my go-to books for quilting ideas due to it's more modern, free form designs.

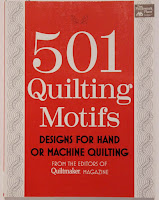
3. 501 Quilting Motifs from QuiltMaker magazine (affiliate link)

501 quilting motifs by quiltmaker magazine

This book is for the more traditional quilter who wants to place motifs in the blocks and borders of the quilt. Full of a variety of themed motifs, there's certainly one to fit any style of quilt. 

In fact, I recently used the Holly Wreath motif on my Reindeer Wreath quilt. I traced the motif onto paper and cut out several copies. Before starting the quilting, I laid them on the quilt to decide on placement,


then put tape on the backside to hold them down so I could easily stitch around them. A very easy process suitable for a domestic or longarm machine. See this quick video, Quilting with Templates, to see it done on a longarm.

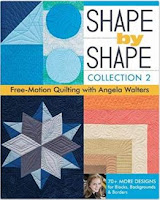
4. Shape-by-Shape Collection 2 by Angela Walters (affiliate link)

shape by shape collection 2 quilting book

Shape by Shape Collection 2 expands on Angela's first book with even more designs for pieced shapes. Both books include background fills and border ideas, plus lots of tips for varying the designs to make them yours. 

5. Rulerwork Quilting by Amanda Murphy (affiliate link)

ruler work quilting idea book by amanda murphy

And just like Angela, Amanda's companion book full of ruler work designs gets my final vote into the 5 Must-Have Quilting Books. In this book, she covers multiple designs with straight or curving lines, adding creative fills to really bring out the quilting designs. Definitely a terrific resource for combining lines and free-motion fills.

And here they are, my 5 Must-Have Quilting Books. I hope they become yours too!

5 must have quilting books

But wait - there's more! In addition to these 5 Must-Haves, I have an additional list of 5 quilting books, in case those above aren't what you're looking for.

6. Step-by-Step Texture Quilting by Christina Cameli (affiliate link)

step by step texture quilting by christina cameli

If you love negative space, and the unlimited choices of texture for that space, then consider keeping this book close to your machine. Full of fantastic free-motion texture quilting, this book has so many designs, it's hard to choose. Last year, I quilted wood grain and fog onto Helen's Halloween quilt.


7. Next Steps in Machine Quilting by Natalia Bonner (affiliate link)

next steps in machine quilting by natalia bonner

This book encompasses the best of both worlds, especially for the domestic machine quilter. Quilting designs here include both free motion and straight lines, but quilted with a walking foot. Of course, these designs are also suitable for the longarm quilter too.

8. Straight Line Quilting Designs from numerous designers (affiliate link)

straight line quilting designs

This is another go-to quilting book, specifically with ruler use in mind. Use the designs as is, or get creative and quilt free-motion designs inside.

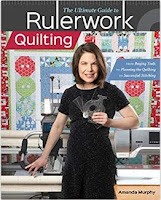
9. The Ultimate Guide to Rulerwork by Amanda Murphy (affiliate link)

the ultimate guide to rulerwork by amanda murphy

Another of Amanda's great books, this one takes ruler quilting to the next level. It's more than straight lines here - Amanda uses a variety of rulers with different cuts and curves in them to achieve completely custom looks. She gives tips on buying specialty rulers, and advice on planning out quilting designs. 

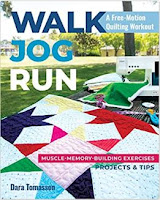
10. Walk, Jog, Run by Dara Tomasson (affiliate link)

walk jog run quilting book by Dara Tomasson

This is a new-comer to the quilting book lineup, and is perfect for the quilter just starting out with free-motion quilting. The book includes patterns for several quilted projects, and each one has 5 quilting design options to choose from.

To read a terrific review and see more project pictures from Walk, Jog, Run, check out the Best Kind of Exercise - The Quilting Workout blog post.

Giveaway time!

With all of these great resources, are you ready to jump into quilting your next quilt? How about a giveaway to get you started? C&T Publishing has generously donated a copy of Walk, Jog, Run to give away to one lucky reader. Contest is open now until August 31, 2020, to the continental US only. Sorry, no Hawaii, Alaska, or international entrants at this time.

The winner will be announced at the Sept 2 Midweek Makers.

Enter via the Rafflecopter below and good luck!


a Rafflecopter giveaway Follow on Bloglovin

My Favorite Patterns