Pages

Friday, January 29, 2021

No Show Binding Video Tutorial

As promised, I'm sharing how I did the no show binding on the Snowflake table runner.

white snowflakes on blue

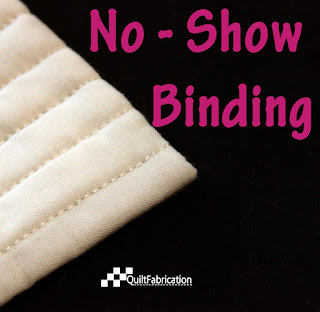
Notice it's not the traditional 1/4" binding edge, but instead a technique I call 'no show binding'. As you can see in the picture below from my No Show Binding tutorial on a previous quilt, the binding is not visible at all.

white quilt with no binding showing

Some may call this a 'faced binding', though I prefer to call it 'no show', and it's perfect for art quilts, landscape quilts, and quilts that would just look better without the binding showing. Here's the binding on the backside of the Snowflake runner, with a small reveal of the front in the lower left corner.

backside of a blue quilt

Looks great, doesn't it? The Snowflake runner definitely needed this style of binding so as not to detract from the snowflakes falling off the edge. A blue line cutting through half a snowflake would just look awkward!

Though I do have a very thorough written tutorial on how to stitch a No Show binding, I'm happy to say I now have a No Show Binding video tutorial.

For a really quick summary of the process, here's some screen captures from the No Show Binding video. Cut 2" wide strips, with 2 strips 1" shorter than the quilt's longest edge, and 2 strips 3" longer than the quilt's other, shorter edge.

binding strips

Press a fold on all strips for a finished edge, stitch the cut edge to the quilt front after centering the strips, 

turn, press, and hand stitch. 


For the long strips, fold the excess to the back at the corners, 


stitch, turn, press, clip out the corner excess,


and hand stitch. 


How's that for a summary? Pretty fast - maybe I've had too much caffeine! Being so abbreviated, I highly recommend watching the
No Show Binding video for more details plus tips and tricks, or at least reading the written No-Show Binding tutorial

For more binding ideas or just tips and tricks, check out the other 9 binding tutorials on the Tutorial page - learn something new or just read to refresh.

Happy Quilting!


Follow on Bloglovin

My Favorite Patterns

Wednesday, January 27, 2021

Midweek Makers

Welcome to Midweek Makers!


Did everyone enjoy the Hearts on Fire blog hop last week? Hosted by Just Let Me Quilt, it was great to see so many heart quilts and small projects, a number of which showed up here on Midweek Makers. Though I'm thoroughly enjoying my Snowflake runner, all those hearts have inspired me to make another heart themed project - here's a sneak peek.

I've used a lot of the recently purchased Valentine fabrics in this next runner 

valentine fabrics

valentine fabrics

- the big reveal will be next Friday.

In case you missed all the hearts last week, head back to last week's Midweek Makers party to check them out, or visit Just Let Me Quilt for the full list.

Once again, the brights have caught my eye. This very colorful scrap quilt from So Yummy,


this pretty sampler from Rebecca Grace Quilting,


and this RSC quilt top from Canadian Needle Nana.


Now it's your turn - what are you working on this week?

  • please link directly to your post
  • please link a quilt related item
  • visit the others and leave some comment love
Have fun!


Follow on Bloglovin

You are invited to the Inlinkz link party!

Click here to enter

Monday, January 25, 2021

Stay at Home Round Robin - 2

Are you playing along with the Stay at Home Round Robin? Ready for the next round, Plus Signs?

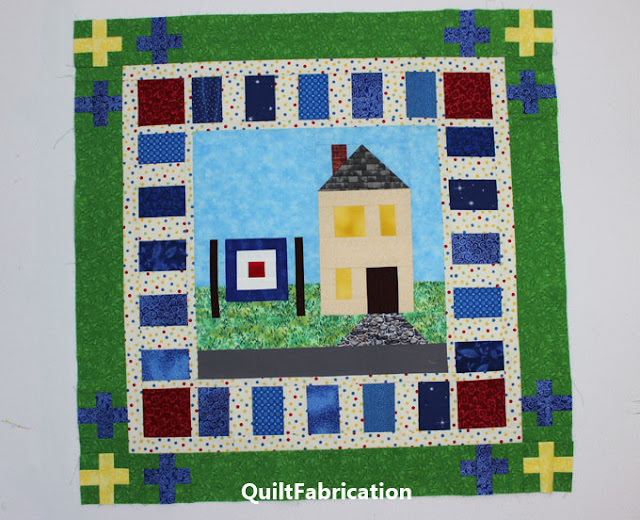
green plus sign border around a house block

Making this round mostly green, I've pulled away from the red, white, and blue theme to bring out the green of the grass. Plus, I thought it would be nice to pull out yellow from the windows, adding spark again in the corners.

yellow and green plus sign blocks in the quilt corners

Unfortunately, I think the yellow is a bit bright, and wished I had chosen a different value. Am I going to remake those plus signs with a different yellow? No, because this is a work-in-progress, no-plan type of quilt. It is what it is, and all I can do is work to lessen my perceived flaw, both within this round and subsequent ones.

So, how about the addition of some blue plus signs to tone down those yellow ones and not make them so bright against the green?

yellow and blue with green plus sign blocks

Yes, that seems to work. And the blue ties the plus sign round with the piano keys and the center, while also minimizing the strength of the green. It's not exactly my favorite round so far, but we'll see what happens when the others are added.

green border with yellow and blue plus signs blocks

There are seven of us leading this Stay at Home Round Robin, and I encourage you to visit each one to see how they are approaching each round.

We are definitely all doing our own individual interpretation of each round, which shows you just what is possible.

If your are joining us in sewing, link up this week with Emily at The Darling Dogwood.

Happy Quilting!


Follow on Bloglovin

My Favorite Patterns

Friday, January 22, 2021

Flexi-Fuse Fusible Web Review

I'm so excited that I finally got to share my long-dreamed-of Snowflake runner yesterday. Just look at those snowflakes - they came out even better than I could have imagined!


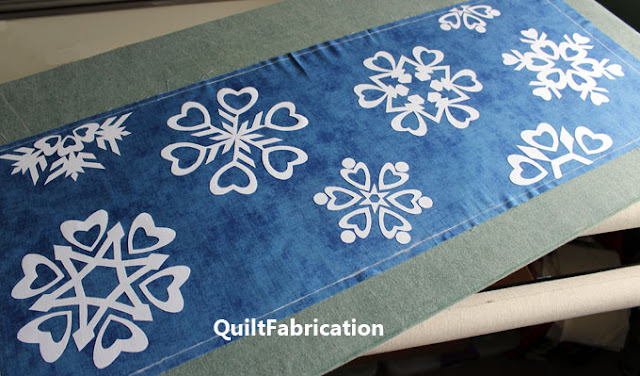
white snowflakes on a blue background

 
A large portion to the success of this Snowflake runner is owed to a fusible web product called Flexi-Fuse (affiliate link). I had ordered both a Flexi Fuse pack of 10 (affiliate link) plus a pack of 25 (affiliate link) several months ago, but hadn't tried it yet. This was the perfect project for testing.

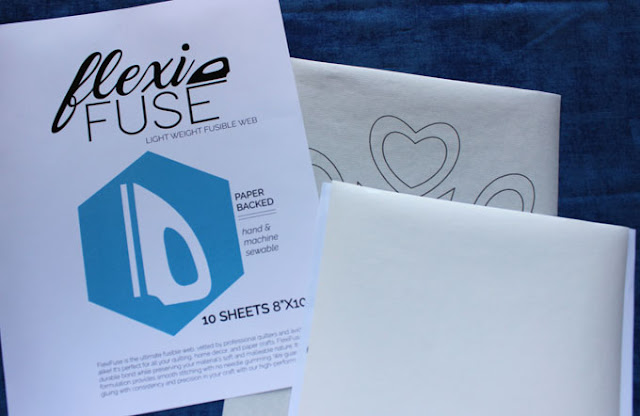
fusible web

For starters, I would put the fusible 'weight' at around a light to medium, with good adherence to the backing paper. Some fusibles fall off the backing easily, but this is not one of those. The fusible itself has a nice grid/weave feel to it, giving me confidence that my appliques will stick.

Another reason I chose this product was because of the convenient 8" x 10.5" sized sheets. It dawned on me I could print my snowflake outlines, eliminating the tracing work. 

Unfortunately, nowhere on the package does the product say it can go through a printer. But hey, I was willing to try, even if it meant sacrificing a sheet. 

Usually I'm wary of putting items, such as a fusible sheet or freezer paper, through my printer. To get around that issue, I'll tape a regular piece of paper to protect the fusible sheet or to cover the slick freezer paper. 

Using small pieces of tape along the top of the paper edge which feeds into the printer, it provides protection for the fusible, or gives the printer something to grip instead of slippery freezer paper.

flexi fuse sheet taped to paper for printing centering


Something that I noticed when taping - the Flexi Fuse sheet is 8" wide. To make sure my snowflakes printed in the 8" space, I made sure the Flexi Fuse sheet was centered on the paper for printing. I could have ordered the Flexi Fuse Roll (affiliate link) and cut my own sheets to size, but these sheets are much more convenient. It certainly pays to check the width of fusible printer sheets before printing a project. 

In the picture below, the Flexi Fuse sheet is centered and taped to paper, ready for printing. Behind it is a snowflake printed out on Flexi Fuse.

flexi fuse fusible web


The instructions for ironing the fusible sheet to fabric are easy and straightforward. Cutting out the snowflake shapes was also easy - the fusible stayed on both the fabric and the paper, and no loose threads or fuzz along the edge. 

Just as easy was fusing the snowflakes to the background fabric - no damp press cloth required! Check out the clean edges and no gumming up on the needle.

white snowflakes on a blue background


As for the final hand the appliques have, I'd say soft, especially since no excess Flexi Fuse was cut out from the snowflakes. Every single bit of white is completely fused to the background. It's certainly a nice feel!

I'm glad I finally got to test Flexi Fuse, especially with these snowflakes, and I'm looking forward to using it again.
Happy Quilting!


Follow on Bloglovin

My Favorite Patterns

Thursday, January 21, 2021

Snowflake Table Runner

Welcome to my day of the Hearts on Fire blog hop, hosted by Carol of Just Let Me Quilt. I've showed several sneak peeks lately and now it's time for the big reveal of my heart themed Snowflake runner!

white heart themed snowflakes on a blue background for a table runner by QuiltFabrication

For years, I've wanted to make a runner of randomly placed and falling-off-the-edge snowflakes. But the mechanics of how to do that eluded me. Sure, I could cut paper patterns and trace them, but that didn't sound like fun.

Then, when the Hearts on Fire hop came up to use hearts, but with the stipulation that we couldn't use red, I had to think outside the box. It's then that things started to fall into place to finally realize my snowflake runner dream.

First, I started to play with the wreathmaker tool in EQ8. I made a few hearts, added extra elements to them, then adjusted everything with the wreathmaker tool to create my first snowflake.

one white heart themed snowflake

Turns out, designing the snowflakes became addicting. Within a hour or so, I had four heart themed snowflakes designed in EQ8. That's all fine and good, but how do I get them easily to fabric?

Element two now comes into play to make all of this work. Enter Flexi-Fuse (affiliate link), a new-to-me fusible web.

flexi fuse applique webbing

I had ordered this several months ago, but hadn't tried it yet. Then it dawned on me - I could print my snowflake outlines, eliminating the tracing work. Sweet! Tomorrow, I'll review Flexi Fuse, sharing some pointers on using it. 

Now, back to the snowflakes. All that was necessary was a suitable background fabric, a bit of random placement, and my snowflake runner becomes a reality.

snowflake appliques fused to a background


Though the snowflakes look complex, they're really quite simple. Looking closely, most of them cut out as one piece. Some are several pieces of easy shapes. My goal was to make them interesting but not complicated.

Printing, fusing, and cutting went smoothly, as did the applique stitching using invisible thread and a short, narrow zigzag in free motion mode or what I call freemotion applique. 

What's freemotion applique? It's a faster way to stitch around an applique without all the turning, and the same technique I used on Gnome for the Holidays - check out the Freemotion Applique tutorial, or watch my Freemotion Applique in action on YouTube.

stitching down snowflake appliques


Once all the applique stitching was done, it was time for quilting. I chose a dense, echoed triangle fill for the background, plus outlining around the snowflakes.

dense echoed triangle fill around snowflakes


Notice there's no binding showing. I'll go over how I did that in a post next week. For now, enjoy a couple more closeups of those pretty heart-themed snowflakes.

closeup of four heart themed snowflakes on a table runner by QuiltFabrication

And the other end.

closeup of four heart themed snowflakes

And I LOVE LOVE LOVE IT! It came out better than I ever could have imagined.

A couple more things:

The Snowflake runner pattern is available in my Etsy shop. The pattern includes the 7 full size, printable snowflakes used on the runner, plus an eighth bonus snowflake. 

And be sure to visit these other quilters today for their heart inspired creations. 

 January 21

Ms P Designs USA

Beaquilter

Becky’s Adventures in Quilting and Travel

Ridge Top Quilt

For The Love Of Geese

Sew Many Yarns

Quilting Gail


For the full Hearts on Fire blog hop list for the week, please visit Carol at Just Let Me Quilt.

orange heart on fire

 Happy Quilting!


Follow on Bloglovin

Enjoyed this post? Don't miss out - get posts delivered directly to your inbox with follow.it.  

           
GET POSTS BY EMAIL

My Favorite Patterns

Wednesday, January 20, 2021

Midweek Makers

Welcome to Midweek Makers - let's share what we're working on!

midweek makers surrounded by snowflakes

I always associate January with snow and often decorate my home in blue and white in the few weeks between Christmas and Valentine's Day. Let It Snow, Frosty Lace, and Frozen adorn the walls, while Winter Forest and and a new creation grace the tables. Here's a sneak peek of the newbie, with the big reveal on Friday for the Just Let Me Quilt's Hearts on Fire blog hop.

white hearts on a blue background

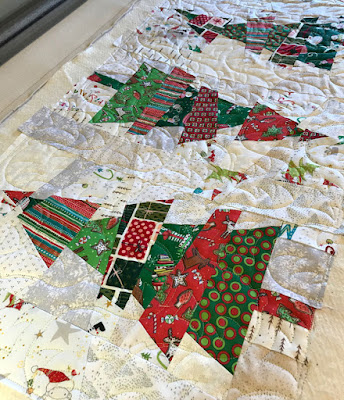
Though Christmas is over, it's not for client quilts. Here's two I worked on over the last week, adding pale green trees to this scrappy tree runner,

red and green scrappy christmas trees

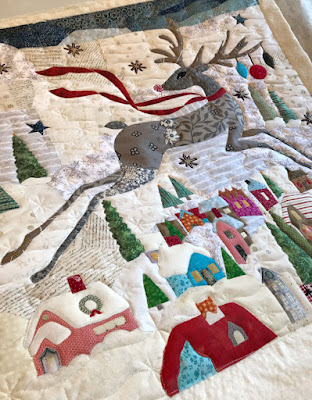
and snowdrifts and snowflakes to a Peppermint Reindeer.

taupe applique reindeer on a cream background

snowdrifts and snowflake quilting on a reindeer quilt


While on the subject of Christmas, one last cute gnome quilt showed up last week, quilted by Grace and Peace Quilting.

gnome quilt


What's your share this week - we'd love to see! Come link up!

  • please link directly to your post
  • please link a quilt related item
  • visit with the others and leave some quilt love
Have fun!


Follow on Bloglovin

You are invited to the Inlinkz link party!

Click here to enter