Remember my Four Star Salute runner project for the Show Your Stripes hop last week?
Hiding within all the pretty pictures, there's a link to a video tutorial for binding wide angle corners. That's those 135 degree corners found on both the Four Star Salute and the Clover Field runners. They may look daunting, but they are really easy to bind. Check out the video to see for yourself.
With today's post, I'm supplementing the video with a written tutorial of detailed instructions and pictures on how to bind wide angle corners, those corners that are 135 degrees.
It's a simple process, relying on the traditional stopping 1/4" before the project's corner, making a fold, and continuing down the next edge. Let's get started with the tut!
Set up the sewing machine
Set the sewing needle 1/4" away from the machine's right foot edge for a 1/4" seam allowance.
Stitch binding to within 1/4" of the corner
Stitch binding to within 1/4" of the wide angle corner.
Leaving the needle down in the project, make a small fold in the binding, at the needle.
Line up the binding edge with the project edge, holding the fold in place.
There may be a small ripple in front of the needle due to all the fabric at that spot. Just hold the fold while stitching.
Continue stitching binding until complete
Clip binding seam allowance
At all of the wide angle corners, clip the binding in the seam allowance so that it lays flat.
Turn binding to back and press
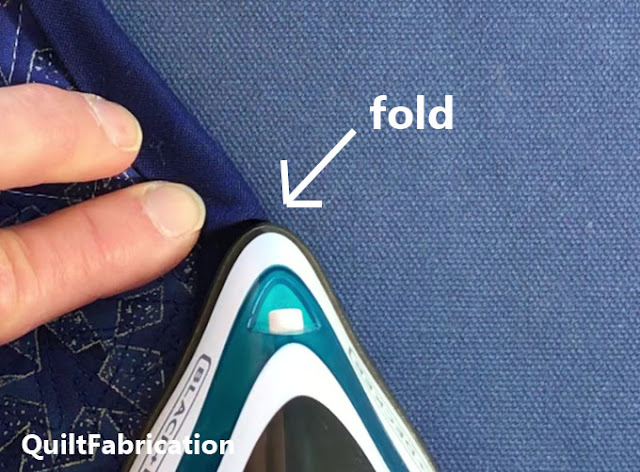
Press on the front for a crisp binding edge at the seam. On the back, press the binding over the project edge, working toward the wide angle corner. Use the iron tip to help make a small fold in the binding at the wide angle corner.


I always appreciate your tutorials. They're easy to follow. I share tham with my quilting friends.
ReplyDeleteCynthia
Nice tutorial! Thank you.
ReplyDeleteGreat tutorial! I am surprised at how many people have difficulty figuring this one out...but thanks to you fewer will have that problem.
ReplyDelete