Saturday, May 29, 2021

Hold It Together - It's Paperclip Day!

Did you know today, May 29, is National Paperclip Day? I'm celebrating the humble paperclip, that indispensable office supply, with my delightful Hold It Together wall hanging.

several different colored paperclips on a quilt


Silly, I know, but I had a blast making this wall hanging full of fun, colorful paperclips. Take this wall hanging as seriously as you want!!

Some may see the humor in the Hold It Together statement in regards to paperclips. Some may see it as a representation of our busy lives. And of course, there's always the statement it makes regarding our past year of shelter-in-place. Any way you view it, Hold It Together is charming! 

9 different colored paperclips


Made with applique paperclips and lettering, the arrangement can be however you want. I chose to link the paperclips around in a circle, but they could be formed into a chain, or even a heap - the possibilities are endless! The Hold It Together pattern includes the full size paperclip and lettering applique templates - just print, trace, and fuse.

Now for some closeups. I went a bit wild on the quilting, doodling all sorts of designs. I think the craziness adds wonderfully to the mood of this quilt.


Hold It Together closeup 4


More closeups to show how all the areas are so different.


Hold It Together closeup 2


Hold It Together closeup 1

Here's a super close-up shot.


Hold It Together closeup 3


The border has simple piano keys, leaving all of the attention on the pretty quilting in the center.


Hold It Together border quilting

Don't you just love how black attracts all sorts of fuzz? Seems like removal is never-ending, though nothing that a lint roller won't take care of. I think I'll be able to hold it together!

Happy National Paperclip Day!


Follow on Bloglovin

Enjoyed this post? Don't miss out - get posts delivered directly to your inbox with follow.it.  

           
GET POSTS BY EMAIL


My Favorite Patterns

Friday, May 28, 2021

Star and Cross Block Tutorial

The folks over at EQ announced the fifth block for the Block Base+ Sew Along - the Star and Cross block, or number 1915b. Here's my Star and Cross version, at a 12" finished square size to keep in line with my previous four blocks.

pink green and blue batik quilt block


At first glance, the Star and Cross looks complicated, considering that those dark pink kite shapes are usually cut with templates. No need for a template in this 12" block tutorial - I've got a different way! 

How is that possible? I like to take the EQ template shapes and redraw them with right angles for easier cutting. In the picture below, I've made the kite into a square, then measured where the cut should be for the kite shape. Now that you know my secret, anyone can make this block!

quilt templates on paper


The tutorial below is for a finished 12" Star and Cross block, with cutting sizes and step-by-step instructions to make one block. 

I've also included an approximate size cutting chart plus pattern adjustments for a 9" finished block. I say approximate because I have not tested the 9" size, so take those measurements with a grain of salt. 

Here's my colored mockup of the Star and Cross block from EQ,

pink green and blue star


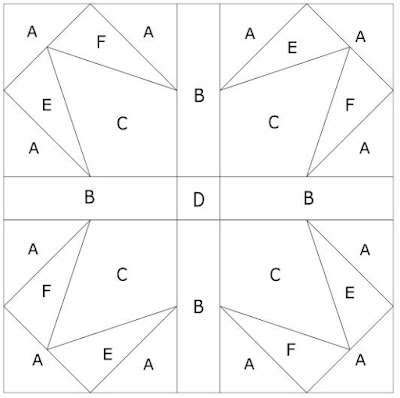
and here's the block with labeled parts.

black and white star and cross printout

12" Finished Star and Cross Block Tutorial

Materials 

Decide which fabrics/colors to use for each part and cut the following to make 1 (one) block:

A     6 (six) 3 1/2" squares for corners
B     4 (four) 1 3/4" x 5 7/8" rectangles for sashing
C     4 (four) 4 3/4" squares for kites
D     1 (one) 1 3/4" square for center
E     2 (two) 5 1/8" x 2 5/8" rectangles
F     2 (two) 5 1/8" x 2 5/8" rectangles

squares and rectangles of fabric


Further subcut the following pieces:
A  -- cut all 6 squares on the diagonal
E  -- with right sides up, cut both rectangles on the diagonal, from lower left to            upper right. Rotate lower triangles for a total of four.
F  -- with right sides up, cut both rectangles on the diagonal, from upper left to            lower right. Rotate lower triangles for a total of four.


C  -- to make the kite shape, work with squares right side up. From upper right corner measure over 3 1/8" along the top and also along the right side. Make a mark at each spot.

fabric and rulers


Place ruler in line with mark and lower left corner. Cut. Repeat for other mark to make the kite shape.


fabric and rulers for a kite shape


Now let's get sewing!


Make the Kite Units

The first step is to add the E triangles, then the F triangles to the kite C pieces.


Using a scant 1/4" seam allowance, stitch all E pieces to the left side of kite pieces C. Be aware that the wide portion of triangle E sits at the point of C. 

kite with a triangle


There is also a very small dog ear of C exposed at the tip. Be sure to stitch right into the crevice that the two pieces make. Press seam in either direction.

pink and green fabrics


Repeat the steps using the F triangles on the opposite side of kite C. On this side, the dog ear is prominent. Press seam in either direction.

pink and green kite


Now there are four kites with E and F side pieces. Do not do any trimming.


Add a triangle A to each side of E and F, checking that the seam lands 1/4" away from the block edge, shown where the stylus is pointing. Otherwise, the point may get cut off when the blocks are stitched together. Proper seam placement is seen at the bottom of the unit.


Press seams toward the A triangles. Add the last A triangle along the top, centering it by making a fold in the middle and aligning that fold with the kite point. 


Be careful not to stitch through the kite point! Press the seam toward triangle A.

pink green and blue kite unit


Trim all four kite units to 5 7/8" square. Yes, that's a odd number but trust me, it works!


Assemble the Star and Cross Block

Layout the kite units with points pointing out. Place sashing strips B in between units, adding in the center square D. Stitch a sashing strip B to the upper two kite units and to the lower two kite units. Press seams to sashing B pieces. 


Stitch square D to remaining two B sashing strips. Press seams away from the center square D. Stitch strip to each kite/sashing unit, nesting seams. Press final seams toward B sashing strips.


9 inch Star and Cross Block

Need this as a 9" finished block? Follow all of the above directions with these adjustments.

Piece sizes to cut:

A     6 (six) 2 7/8" squares for corners
B     4 (four) 1 1/2" x 4 1/2" rectangles for sashing
C     4 (four) 3 3/4" squares for kites
D     1 (one) 1 1/2" square for center
E     2 (two) 2 1/8" x 4 1/4" rectangles
F     2 (two) 2 1/8" x 4 1/4" rectangles

Marking for the kite shape C is at 2 1/2" along the top and side, from the upper right corner.
Note: the kite shape is slightly larger in this block, as it's easier to mark 2 1/2" than 2 7/16". I tend to err on a slightly larger piece because I'd rather trim a bit away than have a block that's too small.

Trim the final kite units to 4 1/2" square. Assemble the block as above for a 9 1/2" unfinished block.

Enjoy!


Enjoyed this post? Don't miss out - get posts delivered directly to your inbox with follow.it.  
           
GET POSTS BY EMAIL

Follow on Bloglovin

My Favorite Patterns

Wednesday, May 26, 2021

Midweek Makers 281

Welcome to Midweek Makers! So glad you could join us!


Memorial Day comes next week, as a time to honor all of those who have served to keep our country free. Thank you all for your service.

Being that I'm a big fan of red, white, and blue, I'm featuring a couple quilts with those colors.

The first one is from Bell Creek Quilts, which uses panels of the Statue of Liberty.


I had the chance to visit the Statue of Liberty a couple years ago and found both its museum and Ellis Island to be quite fascinating. The museum features all of the history and construction of the statue, while Ellis Island provides an eye-opener into immigration. I highly recommend putting these on your bucket list of places to visit.

The next quilt, from Melva Loves Scraps, is an adorable cowboy quilt.


The cowboys in red, white, and blue portray another slice of Americana, the Wild West!

Now it's your turn - what do you have to share this week?

  • please link directly to your post not your homepage
  • please link a quilt related item
  • visit with the other guests and leave some comment love
Have fun!


Follow on Bloglovin

You are invited to the Inlinkz link party!

Click here to enter

Monday, May 24, 2021

Cats, Rats, and Quilts

Thank you to everyone who sent a ton of love on Friday for my cat quilt, Sheba. After what happened later that afternoon, I'm almost inclined to love her more than my own cat, Winston! 

Just look at the picture below - got a guess as to what happened?

cartoon woman chasing a mouse

Yes, that was totally me. I was the epitome of the frantic woman chasing a rat with a broom! 

Granted, Winston was doing what cats do - hunt. He caught a little rat, then played with it for a bit.

cat playing with a rat

In the picture, the rat looks like a goner. I went inside to get a bag to put it in, only to come back to see it escaping to nearby bushes. Then Winston was on the hunt again!

Not thinking he'd find it, I busied myself sweeping up the bird seed that was the initial rat attraction. And lo and behold - he caught it a second time!

And here's my mistake - I had left the screen door slightly open. Winston promptly headed into the house to proudly show me what he had - NOOOO!!!!
Why, oh why do cats do this? 

Then started the frantic broom chasing which only succeeded in scaring that little vermin behind the TV console.  

Now what? Winston was no help, because for him, it was 'out of sight, out of mind'. 

I texted hubby. 
"Coming home soon? I need help getting a mouse out of the house!!" 

His reply - 
" Oh geez, the cats are worthless, eh?" 

I briefly told him the story. 

His reply, 
"Wonderful... tell him to carry it back out" 

I wish it was that easy!!!

My plan was to steer the little critter out from behind the console, but I needed to direct him to the outside. A few pillows, bed trays, plus a few quilts (what a way to use them!) would hopefully send him on his way. Risky, cause he could have climbed over everything!

pillows and quilts to block off the room


The picture above was actually taken after the flush. He came out from behind the console like I wanted, but climbed into an unbeknownst-to-me hole in the back of the speaker box, the part circled in the photo below. Geez!

backside of a speaker


Now I'm stuck, waiting on him and hubby, all the while trying to calm down from a very high adrenaline rush. 

Thankfully, hubby was home within 20 minutes, and thought it great that the pest was trapped in the speaker box. After unplugging and carrying the heavy thing outside, he unscrewed the back panel. We finally found the little offender curled up in batting, way up inside the box. With a few shakes, he was out, scampering away into the bushes again.

But this time, Winston was inside. I told him I'd had enough of his antics for awhile! I know he's proud, but for the rest of the weekend I had more fond thoughts for my cats that don't cause such trouble.

four different black cats on quilts


Yes, I still love him, giving him his tummy rubs and such, but I'm keeping a tighter reign on that screen door!

Happy Quilting!


Follow on Bloglovin

Enjoyed this post? Don't miss out - get posts delivered directly to your inbox with follow.it.  

           
GET POSTS BY EMAIL


My Favorite Patterns

Friday, May 21, 2021

Sheba

I've fallen in love - with Sheba, my newest feline!

black cat applique on fur print fabrics

This cat themed lap quilt is a purr-fect submission for the Born to be Wild Blog Hop, hosted by Carol of Just Let Me Quilt

black and white leopard face

Though today is the last day of the hop, there's still plenty to see - be sure to visit my fellow creators posting today,


The theme of this hop was, again, the purr-fect opportunity to use a fur-themed 20-strip jelly roll, transforming it into four-patch blocks,


then adding from a meowntain of fur-prints. I even got the chance to cut squares using the Crafters Edge Crossover II machine, making quick work of cutting from small scraps.


It would have been nice to see Sheba grow on the design wall, but that's a very crowded space right now, making that an im-paw-sibility. Instead, I laid blocks out on the floor to see where this design might go. The floor space soon became cramped, with barely enough room to step around. At one point, I made sure to close the door to prevent a feline cat-astrophe! Learned my lesson from a few of years ago regarding those.

Using up that jelly roll created a lot more blocks, giving way to a simple design. Then it became a fast and easy quilt, one that even a new quilter could make.

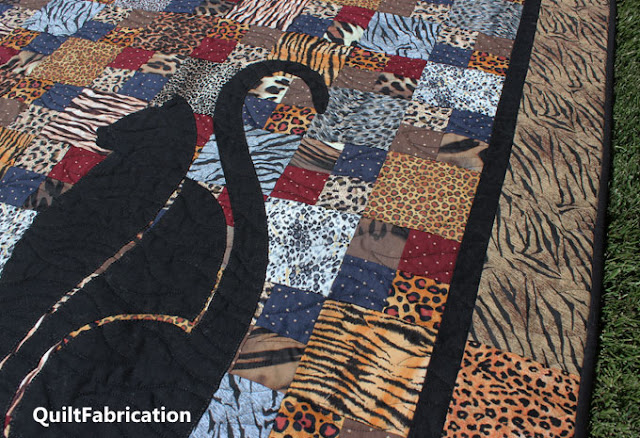
But the best was yet to come! Once I had the Sheba cat applique cut out, that's when I fell in love - she's definitely wild, majestic, and so full of purr-sonality!

black cat applique on fur fabrics


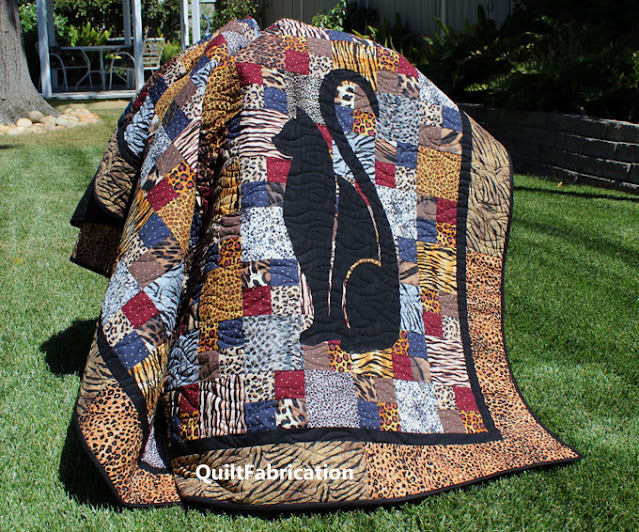
Now for the big reveal of Sheba, my paw-some cat themed quilt! Measuring in at approximately 54" x 70", I can't wait to snuggle with her on my lap!


black cat appliqued on fur fabrics


Purr-haps Sheba has captured you're heart too? She's ready for love with the lap size pattern available in my Etsy shop. Suitable for beginner quilters, the Sheba pattern includes all instructions AND full size reverse templates for Sheba herself - just print, trim, tape, and trace! All that's needed is the fabric and in no time Sheba will be a wild member of your home too!

Though it's technically the end of the hop, the fun will continue through next week. From now until midnight May 27, 2021, Sheba is available at the special introductory pattern pricing of $6. Be sure to get your copy now before it's too late!

Happy Quilting!


Follow on Bloglovin

Enjoyed this post? Don't miss out - get posts delivered directly to your inbox with follow.it.  

           
GET POSTS BY EMAIL


My Favorite Patterns


Wednesday, May 19, 2021

Midweek Makers 280

Welcome to Midweek Makers! This week is the Born to be Wild blog hop, full of wild animals and such, with mine fitting in just fine. Here's a sneak peek of a few of the blocks, made from a hand-selected 20-strip jelly roll I've had in my stash.

There's more to come on Friday - stay tuned!

Moving on to the Midweek Makers, I liked the red theme so much last week that I'm going to continue with it, picking three projects that have a major pop of red in them.

From Vicki's Crafts and Quilting, a Swirling Card Tricks table topper,


from Not Afraid of Color, these hexies, plus A LOT of red projects on her post,


and from Sew Preeti Quilts, a few red blocks.


What's your share this week? Come link up!

  • please link directly to your post not your homepage
  • please link a quilt related project
  • visit with the others and leave some comment love
Have fun!


Follow on Bloglovin

You are invited to the Inlinkz link party!

Click here to enter