Today I'm sharing a few hints and tricks that I've learned in die cutting, using the Crossover II machine from Crafters Edge.
I had the machine and several dies for a few months now, enjoying the system for cutting accurate shapes. That star seen above was certainly quick and easy!
As a newbie, here's a few things I've learned about die cutting which I hope will help you when you get your machine.
1. Apply fusible to the fabric first
I've made three projects that require fusing, and on each and every one, I forgot to apply the fusible before cutting. You'd think I'd have learned after the first or even second time!
My excuse for the first omission is the excitement over cutting with a new quilting gadget. How fun to make a fabric/die sandwich, wind it through the rollers, and pop out a perfectly cut shape on the other side!
Sounds silly I know, but I'm one of those who finds joy in the simplest of things. Which makes it totally understandable as to why I forgot the fusible.
To rectify my problem, it seems easy enough to just cut the fusible with the die.
Ultimately though, I had a nice star outline which fit perfectly onto my fabric star. Problem solved - this time.
2. Do not stack fusible sheets then cut them with the die machine
This was snafu #2. Once again, I'd forgotten to put the fusible on several circles I was cutting. Being the queen of efficiency, stacking and cutting fusible web, seemed like a great idea. Just look at all those layers the arrow is pointing to - one cut and done!
So much for that idea, which goes back to the first point - apply fusible first.
3. Do not die cut batting
Unless you want felt, the pressure from the rollers will crush any poof in that batting. 'Nuff said.
4. Use tape for fussy cutting
Notice in the picture above I'm using two circles, which will cut out a ring and an inner circle. When the ring has to be perfect all around, use a piece of tape to hold the two dies in place. The tape is hard to see, but it's in that black circle.
I used this technique when cutting out a window frame,
to fuse to my beach house.
5. Adjust the roller pressure or remove a fabric layer
One piece of fabric needs different pressure (usually less) than several layers. Too much, and you'll find the sheet metal piece getting deep groves in it, not to mention how much harder it is to crank the sandwich through the rollers.
And there's also the fabric thickness too consider. The pressure that had been working well for a stack of five fabrics may need adjustment with a new stack due to either thinner or heavier fabric.
I found that out when cutting the leopard prints for Sheba. One or two fabrics were thick, making the first cut unsuccessful. Removing a fabric layer helped more than changing the pressure. And the die was easy to replace in the same spot as usually there were heavy indents in the fabric that the die fell back into. Not all was lost!
5. Place the die at a slight angle with the rollers
The whole die sandwich has an easier time going through if the die is at a bit of an angle to the rollers. It gives those rollers a chance to gradually move along the die edge versus butting right up against it, like hitting a speed bump.
6. Support long strips
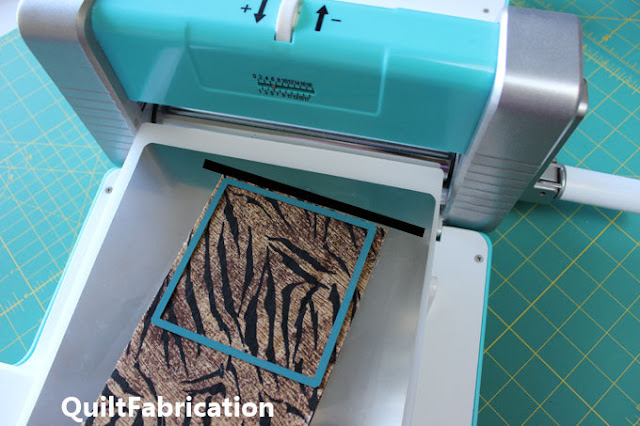
There are times when it makes for better fabric usage to cut from a long strip. I did this when cutting triangles, turning the die for each cut to conserve fabric. Just be sure that the bulk of the strip is supported off the cutting surface. Otherwise, it wants to slide off. The strip in the photo is on the short side, but you'll understand the point when there's a 15-20 inch tail.
Phew! I've reached the end of my list of what I've learned so far about using a die cutting machine, and I hope you find this useful. I'll admit I'm having a lot of fun creating projects from the various Crafters Edge dies, so be prepared to see more in the next few months.
Happy Quilting!

Enjoyed this post? Don't miss out - get posts delivered directly to your inbox with follow.it.


Great tips, Susan. I'm still working on my techniques as well!
ReplyDeleteGreat tips and tricks! Thank you for sharing!
ReplyDeleteGreat tips...thanks for sharing!
ReplyDeleteGreat tips!
ReplyDeleteThank you for sharing, and linking up ;)
Hi Susan! I had to giggle a bit over some of your tips. Especially when you forgot the fusible the second time. I can totally understand the excitement of a new toy (!!) and to see how it works. You shared some great tips and it does make me want to get one for myself. Thank you! ~smile~ Roseanne
ReplyDeleteThis comment has been removed by a blog administrator.
ReplyDelete