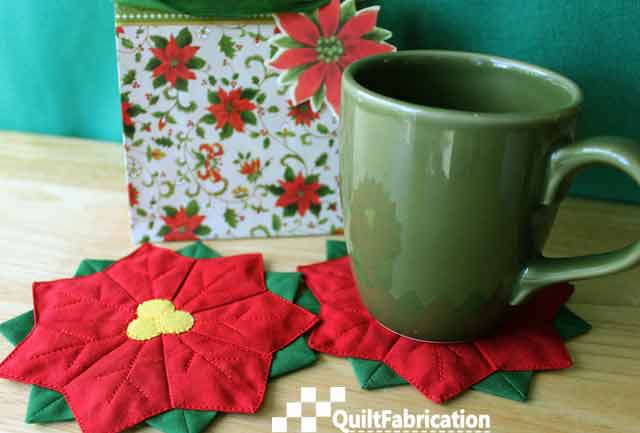
Aren't these flower coasters just perfect for the Mug Rug Blog Hop, hosted by Carla of Creatin' In the Sticks? Someone bring out the coffee and tea!
Monday, November 15th
Tuesday, November 16th
Wednesday, November 17th
Thursday, November 18th
Since I'm in the Christmas mood lately, after all of those free Christmas quilt patterns shown on Friday, I decided to start using my poinsettia flower coasters a bit early.
These pretty blooms are my own design, using a modified Dresden Plate block to make both the flower and the greenery - both are super easy to sew. To make a daisy or a Black-eyed Susan, all that's needed is a change of flower color and a different center applique. The full Flower Coaster pattern includes templates for both the petals, leaves, and the different centers.
Here's a brief tutorial on how easy it is to sew these adorable Dresden Plate Flower Coasters - you'll want to make more than one!
For the poinsettia, I chose Kona Rich Red and Basil Green. After cutting a strip from each color, the Dresden Plate pieces are cut out using the pattern provided template.
Here's a hint to keep from trimming the template: Put a ruler alongside the edge of the template,
For the poinsettia, I chose Kona Rich Red and Basil Green. After cutting a strip from each color, the Dresden Plate pieces are cut out using the pattern provided template.
Here's a hint to keep from trimming the template: Put a ruler alongside the edge of the template,
hold the ruler in place and move the template aside before making the cut. Certainly wouldn't want to have the template get smaller!
Sewn just like any regular Dresden Plate, it helps to make an angled clip at the fold to reduce bulk.
After opening the seam and turning right side out, the pieces are given a gentle press to make a kite shape.
After stitching the petals (or Dresden Plates) together, the seams are pressed in a circular fashion, and, for the poinsettia, three small circles fused in the center.
Then comes a bit detail stitching on the center appliques and also some leaf veins, which bring this poinsettia to life!
Repeating the construction in green provides the back of the Flower Coaster, which is rotated so that the 'leaves' are exposed between the flower petals.
With a bit of stitching in the ditch and along the outer edges, the poinsettia coaster is now finished!
Here's the back, with a touch of sealant, such as Fray Check, in the center to take care of any fraying.
I had a ton of fun making these Flower Coasters, and I'm enjoying them with my morning coffee. Won't you join me?
Happy Quilting!
Happy Quilting!

Enjoyed this post? Don't miss out - get posts delivered directly to your inbox with follow.it.
My Favorite Patterns


They are super cute Susan! I think I need to try to make some! Thanks for sharing the tutorial! xx
ReplyDeleteOh those are cute and would make such a cute little gift
ReplyDeleteVery cute coasters, Susan! The red and green solids you chose were perfect for the poinsettia color.
ReplyDeleteLove the coasters! Thanks for showing us how you made them too.
ReplyDeleteWhat a fun and clever design. I love flowers and I can see these in all sorts of colors. Thanks for sharing!
ReplyDeleteGreat fun, I love gifting mug rugs because they are so quick to make up and just darn cute! I must say that I love all 3 of the flowers but since it is getting to be the Jolly Season, I'm quite fond of the poinsettas!
ReplyDeleteThose are so fun and festive. In my head, I"m trying to figure out how to use them to decorate a holiday package too! Love them.
ReplyDeleteI love your poinsettia mug rugs, Susan! Thanks for the tutorial! I love all three. This is a very versatile pattern!
ReplyDeleteWhat a pretty way to start your day. Each flower is lovelier than the next.
ReplyDeleteThanks for the tutorial, Susan. These are so versatile and could be made in so many colors!
ReplyDeleteSo festive looking. They would look great just scattered around the house too.
ReplyDeleteVery pretty! They would make great candle mats!
ReplyDeleteI can already smell Christmas when seeing your coasters. Thanks for the tutorial. I might try a couple.
ReplyDeleteLovely coasters, thanks so much for sharing your technique!
ReplyDeleteThose are darling. Thanks for the tutorial.
ReplyDeleteLovely coasters. Thanks for the tutorial and template. Your Black-Eyed Susan reminds me of a Sunflower. I was also thinking, one could glue or applique a flower center on the back side and then it could be reversible too.
ReplyDeleteThese are so beautiful and look fun to make...love it! Thanks for sharing them, Susan.
ReplyDeleteThese are very pretty. So many patterns, so little time. Thank you.
ReplyDeleteCute flower coasters! Thanks for sharing your tutorial!
ReplyDeleteThose are neat! Thanks for the tutorial.
ReplyDeleteYour flower coasters are fantastic! Thanks for the tutorial.
ReplyDeleteThese are great thanks for the instructions!
ReplyDeleteThese are adorable!!!
ReplyDeleteWhat fun coasters! Great idea.
ReplyDeleteWhat nice coasters for the holidays! Thanks for sharing.
ReplyDeleteYour flower coasters/mug rugs are wonderful. The poinsettia is just so festive.
ReplyDeleteOh, Susan, you are brilliant. I love your design with dresdens. So pretty! Thank you for inspiring us in the NO Ring November Hop.
ReplyDeleteWhat perfect mug rugs. The red one is great for Christmas. Thank you for the tutorial also.
ReplyDeletevery nice Susan! and such a good tutorial :)
ReplyDeletePlease read my post
ReplyDeletePretty flower coasters. the poinsettia is perfect for the holidays.
ReplyDeleteSuper adorable poinsettia coasters. I love it!
ReplyDeleteWow!! Those are some fancy coasters, Susan!! Great addition to The Hop!
ReplyDeleteThese are fun coasters for sure! Maybe a few for my SIL that I stay at during Christmas are in order.
ReplyDeleteThis comment has been removed by a blog administrator.
ReplyDeleteThis comment has been removed by a blog administrator.
ReplyDelete