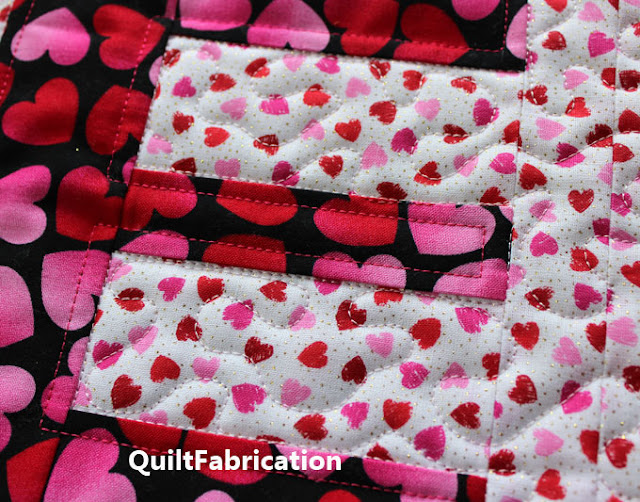
While zipping around the background of the Love runner, filling it with stippling, I was reminded of how important it is to blend the stitching in with the piecing.
Personally, I think any background fill just looks better when the piecing seam is used as a travel line for the fill, giving the impression that the piecing sits on top of the fill. The fill is, after all, in the background, right?
Look closely at the picture above of the letter E from the Love runner. I've stitched those stipple lines right up to the piecing, traveled along the seam, then come back out into the background to complete the fill. Doesn't it look as if some of that stippling is behind the piecing of the E?
Thinking about this prompts me to revisit my Blended Quilting tutorial, which explains in more detail how to do this. Let me show you!
The correct way is to quilt around pieced shapes, letting the quilting bump into the object with stitching that follows the seam line, and then resuming in the background.
This concept applies to any background fill, not just the landscape lines or stipple I've shown you. All it takes is a bit of planning, and the willingness to do a bit of stitch-in-the-ditch to follow the piecing. Hope you give this a try as the results are worth it!

Enjoyed this post? Don't miss out - get posts delivered directly to your inbox with follow.it.


Susan, thank you! This is a great tip, and I will try it the next time I have a chance.
ReplyDeleteWhat a great tip! As a beginning longarm quilter this is invaluable to me because I don't have computer software. I'm just a free-hand quilter! This was really helpful!
ReplyDeleteIt really does look nice done that way.
ReplyDeleteYou are right in, Susan! Thank you sew much for revisiting this concept! Your explanation and tutorial is so clear!
ReplyDeleteYou are spot on with this - and its a great explanation. Gonna try to store it in the memory banks!
ReplyDelete