Pages

Friday, April 15, 2022

Appliqued Hexies

My hexie flowers have become adorable appliques!

pink hexie flowers on a green block

When I posted about these before, I had several people ask me my process for appliqueing the hexies to a background block. So, I thought I share my process since hexies are usually joined together for make a quilt, not appliqued.

I started with hexie flowers, leaving the papers and basting intact.

pink hexie flowers on green


A bit of glue applied in the seam allowances at the side joining seams helps to keep the hexie applique in position on the background - see the white ovals below for locations. Don't overdo the glue as it makes it harder to cut out the background later.


I tried pins, but with the papers, both the flower and the background got distorted. Glue was an easier option. And as for the background block, it's cut 1/4" larger than the finished size needed. Trimming to the correct size is the last step.

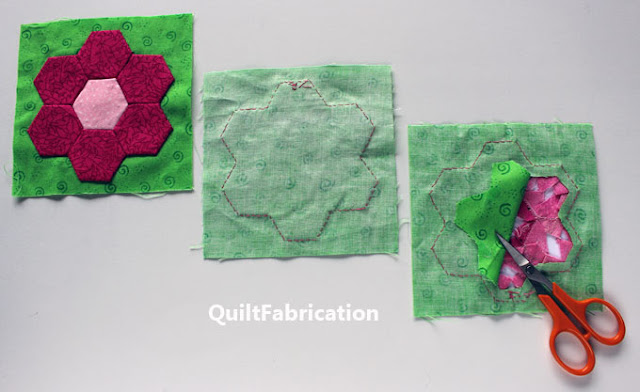
Using a hand applique stitch, the outside edge is stitched to the background with an approximate 3/16 inch stitch length. It's also a good idea to have a stitch at the points and the inner corners to keep that flower secure. Once the stitching is complete, the background can carefully be trimmed out.

pink hexie flowers on green fabric


When I say carefully, I do mean carefully as in just cutting the background fabric. This does require a bit of tugging to release the background from the hexies at the glue points, easily done by slipping the scissor or the Purple Thang in the background opening. It's important to only cut the background at this stage and not the fabric that makes up the hexies.

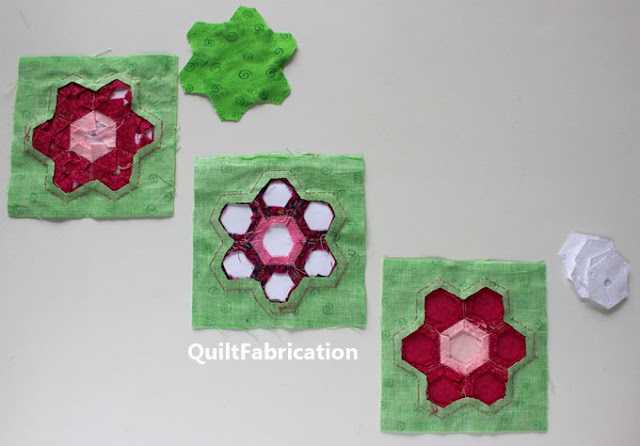
Once the background is removed, trim all of the excess hexie fabric seam allowances to 1/4" to remove fabric bulk. Below is the background trimming in progress, then the background fully removed, and finally, the hexies with a 1/4" seam allowance.

pink hexie flowers on green


Now all of those hexie papers can be removed for use again until the edges get worn down, they have too many holes, or have turned soft and flexible. I will say that the hexie papers with a hole punched in the center are super easy to remove. Those without require a bit of digging along the seam edge, but they do come out.

Below are backside pictures of an untrimmed hexie, a trimmed hexie with papers intact, and finally, a hexie flower with the papers removed.

pink hexies on green


The final touch is to trim the background to the proper block size, making sure the hexies are centered in the block. Though a bit time consuming, all of that trimming work was worth it - these hexie flower appliques feel wonderful! Pliable and with no extra fabric weight - perfect!


Isn't nice to know that there are options for hexies? Makes me want to stitch up some more, though this time I'd feel better if I had a quilt idea first! 

Happy Quilting!


Follow on Bloglovin

Enjoyed this post? Don't miss out - get posts delivered directly to your inbox with follow.it.  

           
GET POSTS BY EMAIL


My Favorite Patterns

3 comments:

  1. glue is an easy option, I do the same and trim the back off to get rid of all that excess fabric - easier to quilt!

    ReplyDelete
  2. Ah hah!! Thank you for the detailed explanation :o)
    Kathleen - kakingsbury at verizon dot net

    ReplyDelete

Thank you so much for commenting...you just made my day!